DSS部署-完整版_dss只有两个服务 links-程序员宅基地
技术标签: linkis dss DataSphereStudio部署流程 大数据
文章目录
- DSS部署流程
-
- 第一部分、 背景
- 第二部分、准备虚拟机、环境初始化
- 第三部分、创建hadoop用户
- 第四部分、配置JDK
- 第五部分 Scala部署
- 第六部分、安装MySQL5.7.25
- 第七部分、安装python3
- 第八部分、nginx【dss会自动安装】
- 第九部分、安装hadoop(伪分布式)
- 第十部分、Hive安装部署
- 第十一部分、Spark on Yarn部署
- 第十二部分、DSS一键安装
- 第十三部分、帮助
- 准备kvm虚拟机
- 环境准备:基础软件安装[telnet,tar,sed,dos2unix,yum,zip,unzip,expect,net-tools,ping,curl,]
- 创建用户
- 配置JDK:JDK (1.8.0_141以上)
- 配置Scala:scala
- 安装MySQL:MySQL (5.5+)
- 安装Python:phthon2(如果用python3需要修改dss中的相关配置,建议使用python2)
- 安装nginx:nginx
- 安装hadoop2.7.2
- 安装hive2.3.3
- 安装spark2.0
- 安装准备[linkis,dss,dss-web],修改配置,修改数据库配置
- 执行安装脚本,安装步骤,是否安装成功,启动服务
DSS部署流程
GitHub :linjie_830914
本文主要用于指导用户进行 DataSphereStudio 的安装、部署,以便用户可以快速入手 和认识其核心功能。
第一部分、 背景
自主研发的大数据中台产品,用以帮助用户快速收集数据、整理数据、构建数仓、数据服务以及数据资产管理。其中涉及很多大数据组件,各个组件都有各自的API,导致开发者学习成本较高,也不易于维护。
故考虑部署学习DSS,基于DSS为客户提供服务。
第二部分、准备虚拟机、环境初始化
1、准备虚拟机
首先通过 qemu-img 创建虚拟磁盘文件
#qemu-img create -f qcow2 -o size=50G,preallocation=metadata CentOS7.qcow2
安装虚拟机命令:
#virt-install --name=kvmdss --virt-type=kvm --vcpus=4 --ram=10240 --location=/home/kvm/iso/CentOS-7.2-x86_64-Minimal-1511.iso --disk path=/home/kvm/img/kvmdss.img,size=50,format=qcow2 --network bridge=virbr0 --graphics=none --extra-args='console=ttyS0' --force
–name 虚拟机名
–memory 内存(默认单位: MB)
–disk 指定虚拟磁盘文件,format指定虚拟磁盘格式,bus 指定半虚拟化(virtio) cache 指定磁盘缓存(回写)
–network 执行网络,不指定网络是无法启动的。bridge 执行网桥设备 model 指定虚拟网卡为半虚拟化,优化性能
–graphics 通过什么方式访问界面,这里使用 vnc ,否则无法输入。
–noautoconsole 不用在界面直接弹出安装界面,后面可以通过 virt-view centos 唤出图形界面
查看此机器是否支持虚拟化:grep -i 'vmx\|svm' /proc/cpuinfo
vmx是英特尔CPU,svm是AMD的CPU
虚拟机操作
-
进入
virsh console kvmdss -
查看
virsh list --all -
启动
virsh start kvmdss -
重启
virsh reboot kvmdss -
暂停
virsh suspend kvmdss -
恢复暂停
virsh resume kvmdss -
关闭
virsh shutdown kvmdss -
强制停止
virsh destroy kvmdss -
开机启动指定的虚拟机:
virsh autostart feng01 -
取消开机启动:
virsh autostart --disable feng01 -
挂起虚拟机(相当于windows睡眠):
virsh suspend feng01 -
恢复挂起的虚拟机:
virsh resume feng01
克隆虚拟机:
克隆虚拟机前需要先关机,按feng01机器克隆feng02机器:
virt-clone --original feng01 --name feng02 --file /kvm_data/feng02.img
– original feng01 :克隆源
–name feng02 ;克隆机器的名字
–file /kvm_data/feng02.img : 文件放在那里
镜像操作
- 创建镜像
virsh snapshot-create-as kvmdss kvmdss-image - 查看镜像
virsh snapshot-lisk kvmdss - 删除镜像
virsh snapshot-delete kvmdss kvmdss-image - 恢复镜像
virsh snapshot-revert kvmdss-image - 查看当前快照版本:
virsh snapshot-current kvmdss
2、环境初始化
关闭防火墙
systemctl stop firewalld && systemctl disable firewalld
关闭selinux
sed -i 's/enforcing/disabled/' /etc/selinux/config  # 永久
setenforce 0  # 临时
关闭swap
swapoff -a  # 临时
sed -ri 's/.*swap.*/#&/' /etc/fstab    # 永久
根据规划设置主机名
hostnamectl set-hostname <hostname>
在master添加hosts
cat >> /etc/hosts << EOF
192.168.100.61 k8s-master1
192.168.100.62 k8s-node1
192.168.100.63 k8s-node2
192.168.100.64 k8s-master2
EOF
将桥接的IPv4流量传递到iptables的链
cat > /etc/sysctl.d/k8s.conf << EOF
net.bridge.bridge-nf-call-ip6tables = 1
net.bridge.bridge-nf-call-iptables = 1
EOF
sysctl --system  # 生效
时间同步
yum install ntpdate -y && ntpdate time.windows.com
安装如下软件
需要zip,官网少一个zip包
yum install -y wget vim telnet tar sed dos2unix zip unzip expect net-tools ping curl
3、准备备如下软件包
jdk\sscala\mysql\python2\nginx\hadoop2.7.2\hive2.3.3\spark2.0
下载链接:https://pan.baidu.com/s/1ydHvk3jc_hAozbbQvBT2Wg,提取码:ojn9
https://blog.csdn.net/weixin_33955681/article/details/92958527)
第三部分、创建hadoop用户
1、创建一个名字为hadoop的普通用户
[root@bigdata-senior01 ~]# useradd hadoop
[root@bigdata-senior01 ~]# passwd hadoop
2、 给hadoop用户sudo权限
注意:如果root用户无权修改sudoers文件,先手动为root用户添加写权限。
[root@bigdata-senior01 ~]# chmod u+w /etc/sudoers
给hadoop用户sudo授权
[root@bigdata-senior01 ~]# vim /etc/sudoers
设置权限,学习环境可以将hadoop用户的权限设置的大一些,但是生产环境一定要注意普通用户的权限限制。
root ALL=(ALL) ALL
hadoop ALL=(root) NOPASSWD:ALL
3、 切换到hadoop用户
[root@bigdata-senior01 ~]# su - hadoop
[hadoop@bigdata-senior01 ~]$
4、 创建存放hadoop文件的目录
[hadoop@bigdata-senior01 ~]$ sudo mkdir /opt/{modules,data}
5、 将hadoop文件夹的所有者指定为hadoop用户
如果存放hadoop的目录的所有者不是hadoop,之后hadoop运行中可能会有权限问题,那么就讲所有者改为hadoop。
[hadoop@bigdata-senior01 ~]# sudo chown -R hadoop:hadoop /opt/modules
第四部分、配置JDK
参考资料
注意:Hadoop机器上的JDK,最好是Oracle的JavaJDK,不然会有一些问题,比如可能没有JPS命令。
如果安装了其他版本的JDK,卸载掉。
卸载原JDK
步骤一:查询系统是否以安装jdk
#rpm -qa|grep java
或
#rpm -qa|grep jdk
或
#rpm -qa|grep gcj
步骤二:卸载已安装的jdk
#rpm -e --nodeps java-1.8.0-openjdk-1.8.0.131-11.b12.el7.x86_64
#rpm -e --nodeps java-1.7.0-openjdk-1.7.0.141-2.6.10.5.el7.x86_64
#rpm -e --nodeps java-1.8.0-openjdk-headless-1.8.0.131-11.b12.el7.x86_64
#rpm -e --nodeps java-1.7.0-openjdk-headless-1.8.0.131-11.b12.el7.x86_64
步骤三:验证一下是还有jdk
#rpm -qa|grep java
#java -version
没有内容证明已经卸载干净了
实际操作记录如下
[root@localhost ~]# java -version
openjdk version "1.8.0_262"
OpenJDK Runtime Environment (build 1.8.0_262-b10)
OpenJDK 64-Bit Server VM (build 25.262-b10, mixed mode)
[root@localhost ~]# rpm -qa|grep jdk
java-1.8.0-openjdk-headless-1.8.0.262.b10-1.el7.x86_64
copy-jdk-configs-3.3-10.el7_5.noarch
java-1.7.0-openjdk-headless-1.7.0.261-2.6.22.2.el7_8.x86_64
java-1.8.0-openjdk-1.8.0.262.b10-1.el7.x86_64
java-1.7.0-openjdk-1.7.0.261-2.6.22.2.el7_8.x86_64
[root@localhost ~]#
[root@localhost ~]# rpm -e --nodeps java-1.8.0-openjdk-headless-1.8.0.262.b10-1.el7.x86_64 copy-jdk-configs-3.3-10.el7_5.noarch java-1.7.0-openjdk-headless-1.7.0.261-2.6.22.2.el7_8.x86_64 java-1.8.0-openjdk-1.8.0.262.b10-1.el7.x86_64 java-1.7.0-openjdk-1.7.0.261-2.6.22.2.el7_8.x86_64
[root@localhost ~]# rpm -qa|grep jdk
[root@localhost ~]#
安装新JDK
(1) 去下载Oracle版本Java JDK:jdk-8u261-linux-x64.tar.gz
Java Archive Downloads - Java SE 7 (oracle.com)
(2) 将jdk-7u67-linux-x64.tar.gz解压到/opt/modules目录下
mkdir -p /opt/modules
sudo tar -zxvf jdk-8u261-linux-x64.tar.gz -C /opt/modules
(3) 添加环境变量
设置JDK的环境变量 JAVA_HOME。需要修改配置文件/etc/profile,追加
sudo vim /etc/profile
export JAVA_HOME="/opt/modules/jdk1.8.0_261"
export PATH=$JAVA_HOME/bin:$PATH
修改完毕后,执行 source /etc/profile
(4)安装后再次执行 java –version,可以看见已经安装完成。
[root@localhost jdk1.8.0_261]# java -version
java version "1.8.0_261"
Java(TM) SE Runtime Environment (build 1.8.0_261-b12)
Java HotSpot(TM) 64-Bit Server VM (build 25.261-b12, mixed mode)
[root@localhost hadoop]#
第五部分 Scala部署
[hadoop@bigdata-senior01 modules]$ pwd
/opt/modules
[hadoop@bigdata-senior01 modules]$ tar xf scala-2.12.7.tgz
[hadoop@bigdata-senior01 modules]$ ll
total 1478576
drwxrwxr-x 10 hadoop hadoop       184 Jan  4 22:41 apache-hive-2.3.3
-rw-r--r--  1 hadoop hadoop 232229830 Jan  4 21:41 apache-hive-2.3.3-bin.tar.gz
drwxr-xr-x 10 hadoop hadoop       182 Jan  4 22:14 hadoop-2.8.5
-rw-r--r--  1 hadoop hadoop 246543928 Jan  4 21:41 hadoop-2.8.5.tar.gz
drwxr-xr-x  8 hadoop hadoop       273 Jun 17  2020 jdk1.8.0_261
-rw-r--r--  1 hadoop hadoop 143111803 Jan  4 21:41 jdk-8u261-linux-x64.tar.gz
drwxr-xr-x  2 root   root           6 Jan  4 22:29 mysql-5.7.25-linux-glibc2.12-x86_64
-rw-r--r--  1 root   root   644862820 Jan  4 22:27 mysql-5.7.25-linux-glibc2.12-x86_64.tar.gz
-rw-r--r--  1 hadoop hadoop   1006904 Jan  4 21:41 mysql-connector-java-5.1.49.jar
drwxrwxr-x  6 hadoop hadoop        50 Sep 27  2018 scala-2.12.7
-rw-r--r--  1 hadoop hadoop  20415505 Jan  4 21:41 scala-2.12.7.tgz
-rw-r--r--  1 hadoop hadoop 225875602 Jan  4 21:41 spark-2.3.2-bin-hadoop2.7.tgz
[hadoop@bigdata-senior01 scala-2.12.7]$ pwd
/opt/modules/scala-2.12.7
[hadoop@bigdata-senior01 scala-2.12.7]$
[hadoop@bigdata-senior01 modules]$vim /etc/profile
export SCALA_HOME="/opt/modules/scala-2.12.7"
export PATH=$SCALA_HOME/bin:$PATH
[hadoop@bigdata-senior01 scala-2.12.7]$ sudo vim /etc/profile
[hadoop@bigdata-senior01 scala-2.12.7]$ source /etc/profile
[hadoop@bigdata-senior01 scala-2.12.7]$ echo $SCALA_HOME
/opt/modules/scala-2.12.7
[hadoop@bigdata-senior01 scala-2.12.7]$ scala
Welcome to Scala 2.12.7 (Java HotSpot(TM) 64-Bit Server VM, Java 1.8.0_261).
Type in expressions for evaluation. Or try :help.

scala>
https://blog.csdn.net/weixin_33955681/article/details/92958527)
第六部分、安装MySQL5.7.25
1、删除centos系统自带的mariadb数据库防止发生冲突
rpm -qa|grep mariadb
rpm -e mariadb-libs --nodeps
2、安装libaio库
yum -y install libaio
3、下载并解压mysql-5.7.25
cd /opt/modules/
wget https://dev.mysql.com/get/Downloads/MySQL-5.7/mysql-5.7.25-linux-glibc2.12-x86_64.tar.gz
tar xzvf mysql-5.7.25-linux-glibc2.12-x86_64.tar.gz
4、查看是否有mysql用户和mysql用户组
cat /etc/passwd|grep mysql
cat /etc/group|grep mysql# 如果存在,则删除用户和用户组userdel -r mysql
5、创建mysql用户及其用户组
groupadd mysql
useradd -r -g mysql mysql
6、设置mysql用户为非登陆用户
usermod -s /sbin/nologin mysql
7、创建basedir、datadir目录、pid文件
mkdir /opt/mysql
mkdir /opt/mysql/data
mv mysql-5.7.25-linux-glibc2.12-x86_64/* /opt/mysql/
touch /opt/mysql/mysqld.pid
chown -R mysql:mysql /opt/mysql
8、创建日志
touch /var/log/mysqld.log
chown mysql:mysql /var/log/mysqld.log
9、创建socket文件
touch /tmp/mysql.sock
chown mysql:mysql /tmp/mysql.sock
10、创建配置文件vim /etc/my.cnf并加入如下内容
[mysqld]
character-set-server=utf8
user=mysql
port=3306
basedir=/opt/mysql
datadir=/opt/mysql/data
socket=/tmp/mysql.sock

[mysqld_safe]
log-error=/var/log/mysqld.log
pid-file=/opt/mysql/mysqld.pid

[client]
port=3306
socket=/tmp/mysql.sock
11、安装初始化
cd /opt/mysql/bin/
./mysqld --defaults-file=/etc/my.cnf --initialize --user=mysql
成功即为如下图所示,记录临时密码。
[root@bigdata-senior01 modules]# mv mysql-5.7.25-linux-glibc2.12-x86_64/* /opt/mysql/
[root@bigdata-senior01 modules]# touch /opt/mysql/mysqld.pid
[root@bigdata-senior01 modules]# chown -R mysql:mysql /opt/mysql
[root@bigdata-senior01 modules]# touch /var/log/mysqld.log
[root@bigdata-senior01 modules]# chown mysql:mysql /var/log/mysqld.log
[root@bigdata-senior01 modules]# touch /tmp/mysql.sock
[root@bigdata-senior01 modules]# chown mysql:mysql /tmp/mysql.sock
[root@bigdata-senior01 modules]# vim /etc/my.cnf
[root@bigdata-senior01 modules]# cd /opt/mysql/bin/
[root@bigdata-senior01 bin]# ./mysqld --defaults-file=/etc/my.cnf --initialize --user=mysql
2022-01-05T06:30:34.747800Z 0 [Warning] TIMESTAMP with implicit DEFAULT value is deprecated. Please use --explicit_defaults_for_timestamp server option (see documentation for more details).
2022-01-05T06:30:35.045935Z 0 [Warning] InnoDB: New log files created, LSN=45790
2022-01-05T06:30:35.085211Z 0 [Warning] InnoDB: Creating foreign key constraint system tables.
2022-01-05T06:30:35.167573Z 0 [Warning] No existing UUID has been found, so we assume that this is the first time that this server has been started. Generating a new UUID: fd58c915-6df0-11ec-96b4-000c297b38d9.
2022-01-05T06:30:35.179666Z 0 [Warning] Gtid table is not ready to be used. Table 'mysql.gtid_executed' cannot be opened.
2022-01-05T06:30:35.185087Z 1 [Note] A temporary password is generated for root@localhost: &:yE0ZgoexP1
[root@bigdata-senior01 bin]#
临时密码:&:yE0ZgoexP1
kvm的虚拟机密码:
Lkp>amgj>3Ys
12、设置开机启动
复制启动脚本到资源目录:
cp ../support-files/mysql.server /etc/rc.d/init.d/mysqld
增加mysqld控制脚本权限:
chmod +x /etc/rc.d/init.d/mysqld
将mysqld加入到系统服务:
chkconfig --add mysqld
检查mysqld服务是否生效:
chkconfig --list mysqld
命令输出类似如下:
[root@hadoop bin]# ll ../support-files/mysql.server
-rwxr-xr-x 1 mysql mysql 10576 Dec 21  2018 ../support-files/mysql.server
[root@hadoop bin]# cp ../support-files/mysql.server /etc/rc.d/init.d/mysqld
[root@hadoop bin]# chmod +x /etc/rc.d/init.d/mysqld
[root@hadoop bin]# chkconfig --add mysqld
[root@hadoop bin]# chkconfig --list mysqld

Note: This output shows SysV services only and does not include native
      systemd services. SysV configuration data might be overridden by native
      systemd configuration.

      If you want to list systemd services use 'systemctl list-unit-files'.
      To see services enabled on particular target use
      'systemctl list-dependencies [target]'.

mysqld          0:off   1:off   2:on    3:on    4:on    5:on    6:off
[root@hadoop bin]#
现在即可使用service命令控制mysql启动、停止。
PS:删除启动命令:
chkconfig --del mysqld
13、启动mysqld服务
service mysqld start
[root@hadoop bin]# chkconfig --del mysqld
[root@hadoop bin]# service mysqld start
Starting MySQL. SUCCESS!
[root@hadoop bin]#
14、环境变量配置
编辑/etc/profile,加入如下内容:
export PATH=$PATH:/opt/mysql/bin
执行命令使其生效:
source /etc/profile
15、登录mysql(使用随机生成的那个密码)
mysql -uroot -p'Lkp>amgj>3Ys'
修改root密码:
mysql> alter user "root"@"localhost" identified by "abcd123";
刷新权限:
mysql> flush privileges;
退出mysql,使用新密码登录mysql。
[root@hadoop bin]# vim /etc/profile
[root@hadoop bin]# source /etc/profile
[root@hadoop bin]# mysql -uroot -p
Enter password:
Welcome to the MySQL monitor.  Commands end with ; or \g.
Your MySQL connection id is 5
Server version: 5.7.25

Copyright (c) 2000, 2019, Oracle and/or its affiliates. All rights reserved.

Oracle is a registered trademark of Oracle Corporation and/or its
affiliates. Other names may be trademarks of their respective
owners.

Type 'help;' or '\h' for help. Type '\c' to clear the current input statement.

mysql> alter user "root"@"localhost" identified by "abcd123";
Query OK, 0 rows affected (0.00 sec)

mysql> flush privileges;
Query OK, 0 rows affected (0.00 sec)
mysql> exit
Bye
[root@hadoop bin]# mysql -uroot -pabcd123
mysql: [Warning] Using a password on the command line interface can be insecure.
Welcome to the MySQL monitor.  Commands end with ; or \g.
Your MySQL connection id is 6
Server version: 5.7.25 MySQL Community Server (GPL)

Copyright (c) 2000, 2019, Oracle and/or its affiliates. All rights reserved.

Oracle is a registered trademark of Oracle Corporation and/or its
affiliates. Other names may be trademarks of their respective
owners.

Type 'help;' or '\h' for help. Type '\c' to clear the current input statement.

mysql>
16、添加远程登录用户
默认只允许 root 帐户在本地登录mysql,如果要在其它机器上连接MySQL,必须修改 root 允许远程连接,或者添加一个允许远程连接的帐户,为了安全起见,可以添加一个新的帐户。
mysql> grant all privileges on *.* to "root"@"%" identified by "abcd123" with grant option;
17、开启防火墙mysql3306端口的外部访问
firewall-cmd --zone=public --add-port=3306/tcp --permanent
firewall-cmd --reload
参数说明:
–zone:作用域,网络区域定义了网络连接的可信等级。
–add-port:添加端口与通信协议,格式:端口/通信协议,协议为tcp或udp。
–permanent:永久生效,没有此参数系统重启后端口访问失败。
18、重新启动mysql
[root@test ~]# systemctl restart mysqld.service
19、常见错误
1 mysql5.7初始化密码报错 ERROR 1820 (HY000): You must reset your password using ALTER USER statement before
2 修改mysql密码出现报错:ERROR 1064 (42000): You have an error in your SQL syntax; check the manual that corres
3 ERROR 1820 (HY000): You must reset your password using ALTER USER statement before executing this st
4 centos mysql 端口_Linux CentOS Mysql修改默认端口
5 mysql 5.7安全策略设置 报错ERROR 1193 (HY000): Unknown system variable 'validate_password
6 CentOS 7下启动、关闭、重启、查看MySQL服务
7 centos7 安装MySQL7 并更改初始化密码
在Linux上安装Python3 - lemon锋 - 博客园 (cnblogs.com)
第七部分、安装python3
dss默认使用python2,如果用python3需要该配置,建议默认使用python3,安装方法与python3类似
下载pip(适用于python3)
 curl https://bootstrap.pypa.io/get-pip.py -o get-pip.py

 下载pip(适用于python2)
 curl https://bootstrap.pypa.io/pip/2.7/get-pip.py -o get-pip.py
 安装pip
 python get-pip.py
 升级pip
 pip install --upgrade pip
 安装matplotlib
 python -m pip install -i https://pypi.tuna.tsinghua.edu.cn/simple matplotlib
 pip install matplotlib
安装依赖环境
输入命令:
# 安装依赖环境
yum -y install zlib-devel bzip2-devel openssl-devel ncurses-devel sqlite-devel readline-devel tk-devel gdbm-devel db4-devel libpcap-devel xz-devel

# 下载python包
wget https://www.python.org/ftp/python/3.7.1/Python-3.7.1.tgz

tar -zxvf Python-3.7.1.tgz

yum install  gcc

# 3.7版本之后需要一个新的包libffi-devel
yum install libffi-devel -y

cd Python-3.7.1

./configure --prefix=/usr/local/python3

编译:
make

编译成功后,编译安装:
make install

检查python3.7的编译器:
/usr/local/python3/bin/python3.7


建立Python3和pip3的软链:
ln -s /usr/local/python3/bin/python3 /usr/bin/python3
ln -s /usr/local/python3/bin/pip3 /usr/bin/pip3

# 会导致yum报错,详见本文最后


并将/usr/local/python3/bin加入PATH

(1)vim /etc/profile
(2)按“I”,然后贴上下面内容:

# vim ~/.bash_profile
# .bash_profile
# Get the aliases and functions
if [ -f ~/.bashrc ]; then
. ~/.bashrc
fi
# User specific environment and startup programs
PATH=$PATH:$HOME/bin:/usr/local/python3/bin
export PATH


source ~/.bash_profile


检查Python3及pip3是否正常可用:
python3 -V
pip3 -V
python2的处理
yum -y install epel-release
yum -y install python-pip
第八部分、nginx【dss会自动安装】
文章转自:https://www.cnblogs.com/liujuncm5/p/6713784.html
安装所需环境
Nginx 是 C语言 开发,建议在 Linux 上运行,当然,也可以安装 Windows 版本,本篇则使用 CentOS 7 作为安装环境。
一. gcc 安装
安装 nginx 需要先将官网下载的源码进行编译,编译依赖 gcc 环境,如果没有 gcc 环境,则需要安装:
yum install -y gcc-c++
二. PCRE pcre-devel 安装
PCRE(Perl Compatible Regular Expressions) 是一个Perl库,包括 perl 兼容的正则表达式库。nginx 的 http 模块使用 pcre 来解析正则表达式,所以需要在 linux 上安装 pcre 库,pcre-devel 是使用 pcre 开发的一个二次开发库。nginx也需要此库。命令:
yum install -y pcre pcre-devel
三. zlib 安装
zlib 库提供了很多种压缩和解压缩的方式, nginx 使用 zlib 对 http 包的内容进行 gzip ,所以需要在 Centos 上安装 zlib 库。
yum install -y zlib zlib-devel
四. OpenSSL 安装
OpenSSL 是一个强大的安全套接字层密码库,囊括主要的密码算法、常用的密钥和证书封装管理功能及 SSL 协议,并提供丰富的应用程序供测试或其它目的使用。
nginx 不仅支持 http 协议,还支持 https(即在ssl协议上传输http),所以需要在 Centos 安装 OpenSSL 库。
yum install -y openssl openssl-devel
官网下载
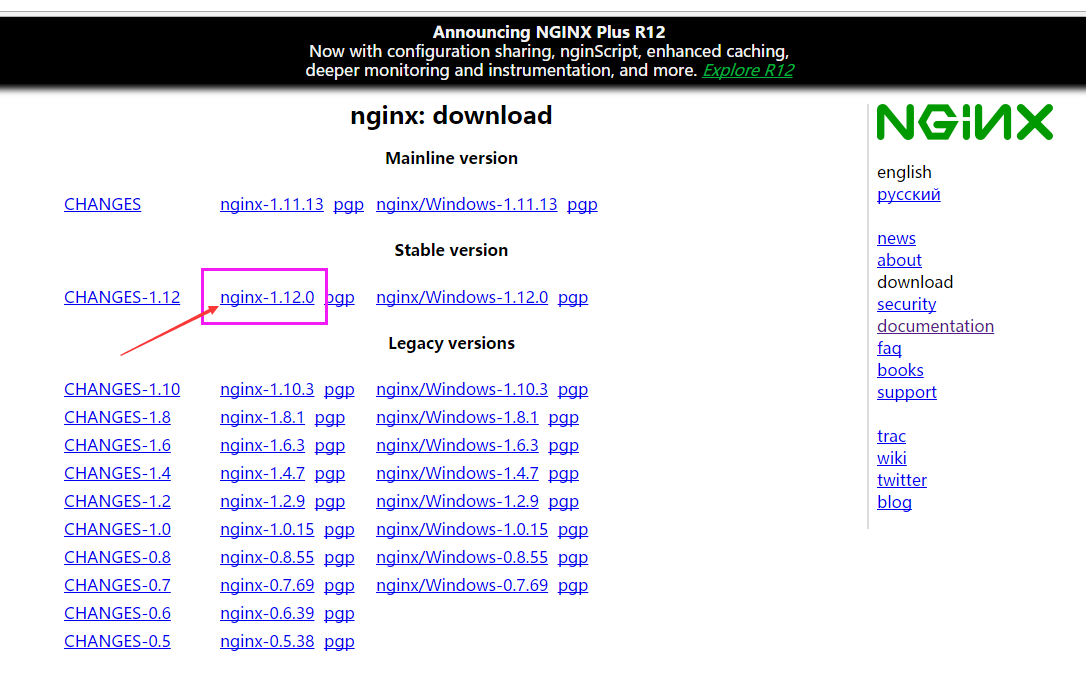
1.直接下载.tar.gz安装包,地址:https://nginx.org/en/download.html
2.使用wget命令下载(推荐)。确保系统已经安装了wget,如果没有安装,执行 yum install wget 安装。
wget -c https://nginx.org/download/nginx-1.21.6.tar.gz

我下载的是1.12.0版本,这个是目前的稳定版。
解压
依然是直接命令:
tar -zxvf  nginx-1.21.6.tar.gz
cd /opt/modules/nginx-1.21.6
配置
其实在 nginx-1.12.0 版本中你就不需要去配置相关东西,默认就可以了。当然,如果你要自己配置目录也是可以的。
1.使用默认配置
./configure
2.自定义配置(不推荐)
./configure \
--prefix=/usr/local/nginx \
--conf-path=/usr/local/nginx/conf/nginx.conf \
--pid-path=/usr/local/nginx/conf/nginx.pid \
--lock-path=/var/lock/nginx.lock \
--error-log-path=/var/log/nginx/error.log \
--http-log-path=/var/log/nginx/access.log \
--with-http_gzip_static_module \
--http-client-body-temp-path=/var/temp/nginx/client \
--http-proxy-temp-path=/var/temp/nginx/proxy \
--http-fastcgi-temp-path=/var/temp/nginx/fastcgi \
--http-uwsgi-temp-path=/var/temp/nginx/uwsgi \
--http-scgi-temp-path=/var/temp/nginx/scgi
注:将临时文件目录指定为/var/temp/nginx,需要在/var下创建temp及nginx目录
编译安装
make
make install
查找安装路径:
whereis nginx
启动、停止nginx
cd /usr/local/nginx/sbin/
./nginx
./nginx -s stop
./nginx -s quit
./nginx -s reload
启动时报80端口被占用:
nginx: [emerg] bind() to 0.0.0.0:80 failed (98: Address already in use)
解决办法:1、安装net-tool 包:
yum install net-tools
./nginx -s quit:此方式停止步骤是待nginx进程处理任务完毕进行停止。
./nginx -s stop:此方式相当于先查出nginx进程id再使用kill命令强制杀掉进程。
查询nginx进程:
ps aux|grep nginx
重启 nginx
1.先停止再启动(推荐):
对 nginx 进行重启相当于先停止再启动,即先执行停止命令再执行启动命令。如下:
./nginx -s quit
./nginx
2.重新加载配置文件:
当 ngin x的配置文件 nginx.conf 修改后,要想让配置生效需要重启 nginx,使用-s reload不用先停止 ngin x再启动 nginx 即可将配置信息在 nginx 中生效,如下:
./nginx -s reload
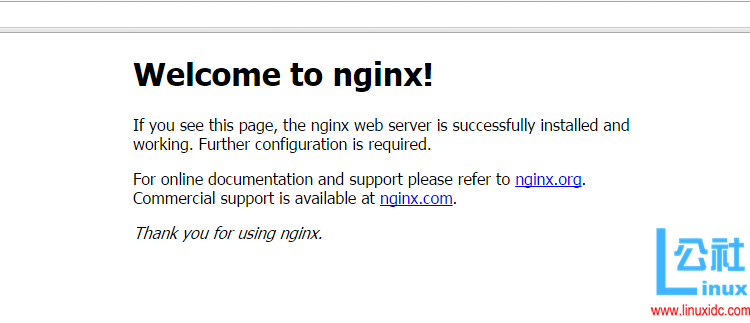
启动成功后,在浏览器可以看到这样的页面:
设置nginx的服务(dss所需)
vim /usr/lib/systemd/system/nginx.service

vim /usr/local/nginx/logs/nginx.pid

mkdir -p /etc/nginx/conf.d
nginx.service脚本如下:
[Unit]
Description=nginx - high performance web server
Documentation=http://nginx.org/en/docs/
After=network.target remote-fs.target nss-lookup.target

[Service]
Type=forking
PIDFile=/usr/local/nginx/logs/nginx.pid
ExecStartPre=/usr/local/nginx/sbin/nginx -t -c /usr/local/nginx/conf/nginx.conf
ExecStart=/usr/local/nginx/sbin/nginx -c /usr/local/nginx/conf/nginx.conf
ExecReload=/bin/kill -s HUP $MAINPID
ExecStop=/bin/kill -s QUIT $MAINPID
PrivateTmp=true

[Install]
WantedBy=multi-user.target
开始开机启动脚本如下:
systemctl enable nginx.service
systemctl start nginx.service
增加conf.d文件夹(dss所需)
创建 /etc/nginx/conf.d 文件夹
在原来文件/etc/nginx/nginx.conf 的http 块下加一句话就可以了:
include /etc/nginx/conf.d/*.conf;
增加nginx虚拟主机配置文件(conf.d) - 与f - 博客园 (cnblogs.com)
开机自启动
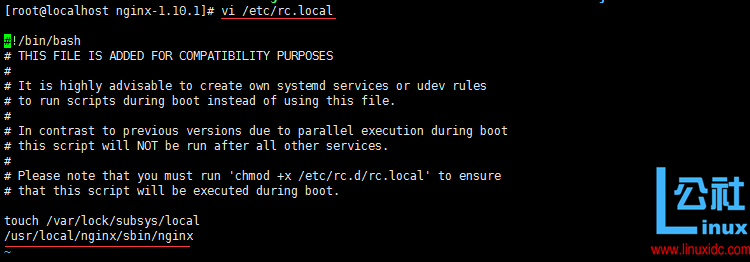
即在rc.local增加启动代码就可以了。
vi /etc/rc.local
增加一行 /usr/local/nginx/sbin/nginx
设置链接(安装dss用到):
ln -s /usr/local/nginx /etc/nginx
设置执行权限:
chmod 755 rc.local
到这里,nginx就安装完毕了,启动、停止、重启操作也都完成了,当然,你也可以添加为系统服务,我这里就不在演示了。
CentOS7安装Nginx - boonya - 博客园 (cnblogs.com)
--------------------------------------分割线 --------------------------------------
Nginx负载均衡配置实战 http://www.linuxidc.com/Linux/2014-12/110036.htm
CentOS 6.2实战部署Nginx+MySQL+PHP http://www.linuxidc.com/Linux/2013-09/90020.htm
使用Nginx搭建WEB服务器 http://www.linuxidc.com/Linux/2013-09/89768.htm
搭建基于Linux6.3+Nginx1.2+PHP5+MySQL5.5的Web服务器全过程 http://www.linuxidc.com/Linux/2013-09/89692.htm
CentOS 6.3下Nginx性能调优 http://www.linuxidc.com/Linux/2013-09/89656.htm
CentOS 6.3下配置Nginx加载ngx_pagespeed模块 http://www.linuxidc.com/Linux/2013-09/89657.htm
CentOS 6.4安装配置Nginx+Pcre+php-fpm http://www.linuxidc.com/Linux/2013-08/88984.htm
Nginx安装配置使用详细笔记 http://www.linuxidc.com/Linux/2014-07/104499.htm
Nginx日志过滤 使用ngx_log_if不记录特定日志 http://www.linuxidc.com/Linux/2014-07/104686.htm
--------------------------------------分割线 --------------------------------------
Nginx 的详细介绍:请点这里
Nginx 的下载地址:请点这里
彻底删除nginx
在开局配置Nginx时有可能会配置错误,报各种错误代码。看不懂或者懒得去看这个报错时,其实最简单的方式是卸载并重装咯。今天就带大家一起学习下,如何彻底卸载nginx程序。
卸载nginx程序的详细步骤
1、停止Nginx软件
/usr/local/nginx/sbin/nginx -s stop
如果不知道nginx安装路径,可以通过执行ps命令找到nginx程序的PID,然后kill其PID
2、查找根下所有名字包含nginx的文件
find / -name nginx
3、执行命令 rm -rf *删除nignx安装的相关文件
说明:全局查找往往会查出很多相关文件,但是前缀基本都是相同,后面不同的部分可以用*代替,以便快速删除~
[root@qll251 ~]# rm -rf /usr/local/sbin/nginx
[root@qll251 ~]# rm -rf /usr/local/nginx
[root@qll251 ~]# rm -rf /usr/src/nginx-1.11.1
[root@qll251 ~]# rm -rf /var/spool/mail/nginx
4、其他设置
如果设置了Nginx开机自启动的话,可能还需要下面两步
chkconfig nginx off
rm -rf /etc/init.d/nginx
删除之后,便可重新安装nginx了
————————————————
版权声明:本文为CSDN博主「开源Linux」的原创文章,遵循CC 4.0 BY-SA版权协议,转载请附上原文出处链接及本声明。
原文链接:https://blog.csdn.net/weixin_38889300/article/details/106682750
第九部分、安装hadoop(伪分布式)
解压Hadoop目录文件
1、 复制hadoop-2.7.2.tar.gz到/opt/modules目录下。
2、 解压hadoop-2.7.2.tar.gz
[hadoop@bigdata-senior01 ~]# cd /opt/modules
[hadoop@bigdata-senior01 hadoop]# tar -zxvf hadoop-2.7.2.tar.gz
配置Hadoop
1、 配置Hadoop环境变量
[hadoop@bigdata-senior01 hadoop]# vim /etc/profile
追加配置:
export HADOOP_HOME="/opt/modules/hadoop-2.7.2"
export PATH=$HADOOP_HOME/bin:$HADOOP_HOME/sbin:$PATH
执行:source /etc/profile 使得配置生效
验证HADOOP_HOME参数:
[hadoop@bigdata-senior01 /]$ echo $HADOOP_HOME
/opt/modules/hadoop-2.7.2
2、 配置 hadoop-env.sh、mapred-env.sh、yarn-env.sh文件的JAVA_HOME参数
[hadoop@bigdata-senior01 ~]$ sudo vim ${HADOOP_HOME}/etc/hadoop/hadoop-env.sh
需要先配置jdk
cd /opt/modules
tar -zxvf jdk-7u67-linux-x64.tar.gz
修改JAVA_HOME参数为:
export JAVA_HOME="/opt/modules/jdk1.8.0_261"
export JAVA_HOME="/opt/modules/jdk1.7.0_79"


# The java implementation to use.
export JAVA_HOME=/opt/modules/jdk1.7.0_79
# Location of Hadoop.
export HADOOP_HOME=/opt/modules/hadoop-2.7.2
3、 配置core-site.xml
sudo vim ${HADOOP_HOME}/etc/hadoop/core-site.xml
(1)先永久修改hostname
想永久修改,应该修改配置文件 /etc/sysconfig/network。
命令:[root@bigdata-senior01 ~] vim /etc/sysconfig/network
打开文件后,
NETWORKING=yes #使用网络
HOSTNAME=dss #设置主机名
然后配置Host
命令:[root@bigdata-senior01 ~] vim /etc/hosts
添加hosts: 192.168.100.20 bigdata-senior01.chybinmy.com
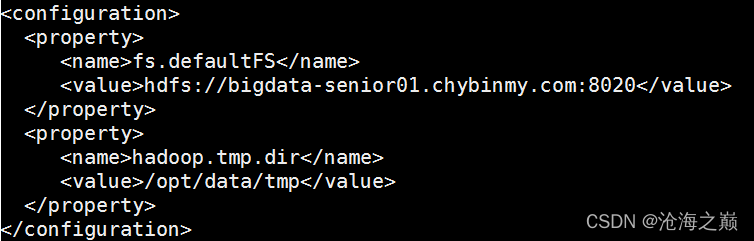
再进行fs.defaultFS参数配置的是HDFS的地址。
<property>
<name>fs.defaultFS</name>
<value>hdfs://dss:8020</value>
</property>
(2) hadoop.tmp.dir配置的是Hadoop临时目录,比如HDFS的NameNode数据默认都存放这个目录下,查看*-default.xml等默认配置文件,就可以看到很多依赖 h a d o o p . t m p . d i r 的 配 置 。 默 认 的 h a d o o p . t m p . d i r 是 / t m p / h a d o o p − {hadoop.tmp.dir}的配置。 默认的hadoop.tmp.dir是/tmp/hadoop- hadoop.tmp.dir的配置。默认的hadoop.tmp.dir是/tmp/hadoop−{user.name},此时有个问题就是NameNode会将HDFS的元数据存储在这个/tmp目录下,如果操作系统重启了,系统会清空/tmp目录下的东西,导致NameNode元数据丢失,是个非常严重的问题,所有我们应该修改这个路径。
创建临时目录:
[hadoop@bigdata-senior01 hadoop-2.7.2]$ sudo mkdir -p /opt/data/tmp
将临时目录的所有者修改为hadoop
[hadoop@bigdata-senior01 hadoop-2.7.2]$ sudo chown hadoop:hadoop -R /opt/data/tmp
修改hadoop.tmp.dir
<property>
<name>hadoop.tmp.dir</name>
<value>/opt/data/tmp</value>
</property>
配置、格式化、启动HDFS
1、 配置hdfs-site.xml
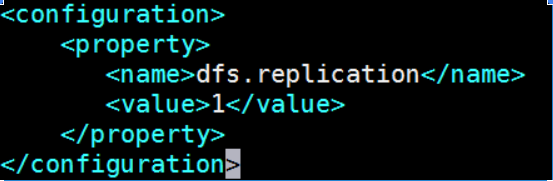
[hadoop@bigdata-senior01 hadoop-2.7.2]$ vim ${HADOOP_HOME}/etc/hadoop/hdfs-site.xml

<property>
<name>dfs.replication</name>
<value>1</value>
</property>
dfs.replication配置的是HDFS存储时的备份数量,因为这里是伪分布式环境只有一个节点,所以这里设置为1。
2、 格式化HDFS
先编辑 ~/.bash_profile 配置文件,增加 Hadoop 相关用户环境变量,配置后就不需要到hadoop的路径下执行相关hdfs命令了
添加后bash_profile文件完整内容如下:
sudo vi ~/.bash_profile

export JAVA_HOME=/opt/modules/jdk1.8.0_261/
export JAVA_BIN=$JAVA_HOME/bin
export JAVA_LIB=$JAVA_HOME/lib
export CLASSPATH=.:$JAVA_LIB/tools.jar:$JAVA_LIB/dt.jar


export HADOOP_HOME=/opt/modules/hadoop-2.7.2/


PATH=$PATH:$HOME/.local/bin:$HOME/bin:$JAVA_BIN:$HADOOP_HOME/bin:$HADOOP_HOME/sbin

export PATH
同样地,环境变量配置完之后,记得执行 source ~/.bash_profile 命令使环境变量生效。

[hadoop@bigdata-senior01 ~]$ hdfs namenode –format -force
格式化是对HDFS这个分布式文件系统中的DataNode进行分块,统计所有分块后的初始元数据的存储在NameNode中。
格式化后,查看core-site.xml里hadoop.tmp.dir(本例是/opt/data目录)指定的目录下是否有了dfs目录,如果有,说明格式化成功。
注意:
1.格式化时,这里注意hadoop.tmp.dir目录的权限问题,应该hadoop普通用户有读写权限才行,可以将/opt/data的所有者改为hadoop。
[hadoop@bigdata-senior01 hadoop-2.7.2]$ sudo chown -R hadoop:hadoop /opt/data
2.查看NameNode格式化后的目录。
[hadoop@bigdata-senior01 ~]$ ll /opt/data/tmp/dfs/name/current

fsimage是NameNode元数据在内存满了后,持久化保存到的文件。
fsimage*.md5 是校验文件,用于校验fsimage的完整性。
seen_txid 是hadoop的版本
vession文件里保存:
namespaceID:NameNode的唯一ID。
clusterID:集群ID,NameNode和DataNode的集群ID应该一致,表明是一个集群。
#Mon Jul 04 17:25:50 CST 2016
namespaceID=2101579007
clusterID=CID-205277e6-493b-4601-8e33-c09d1d23ece4
cTime=0
storageType=NAME_NODE
blockpoolID=BP-1641019026-127.0.0.1-1467624350057
layoutVersion=-57
3、 启动NameNode
[hadoop@bigdata-senior01 hadoop-2.7.2]$ ${HADOOP_HOME}/sbin/hadoop-daemon.sh start namenode
starting namenode, logging to /opt/modules/hadoop-2.7.2/logs/hadoop-hadoop-namenode-bigdata-senior01.chybinmy.com.out

4、 启动DataNode
[hadoop@bigdata-senior01 hadoop-2.7.2]$ ${HADOOP_HOME}/sbin/hadoop-daemon.sh start datanode
starting datanode, logging to /opt/modules/hadoop-2.7.2/logs/hadoop-hadoop-datanode-bigdata-senior01.chybinmy.com.out

5、 启动SecondaryNameNode
[hadoop@bigdata-senior01 hadoop-2.7.2]$ ${HADOOP_HOME}/sbin/hadoop-daemon.sh start secondarynamenode
starting secondarynamenode, logging to /opt/modules/hadoop-2.7.2/logs/hadoop-hadoop-secondarynamenode-bigdata-senior01.chybinmy.com.out

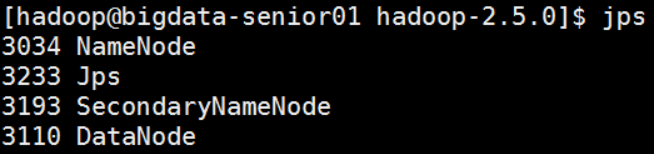
6、 JPS命令查看是否已经启动成功,有结果就是启动成功了。
[hadoop@bigdata-senior01 hadoop-2.7.2]$ jps
3034 NameNode
3233 Jps
3193 SecondaryNameNode
3110 DataNode
现在可以打开:localhost:50070,但是需要关闭selinux才能在本机打开vmware workstation中的服务
7、 HDFS上测试创建目录、上传、下载文件
HDFS上创建目录
[hadoop@bigdata-senior01 hadoop-2.7.2]$ ${HADOOP_HOME}/bin/hdfs dfs -mkdir /demo1
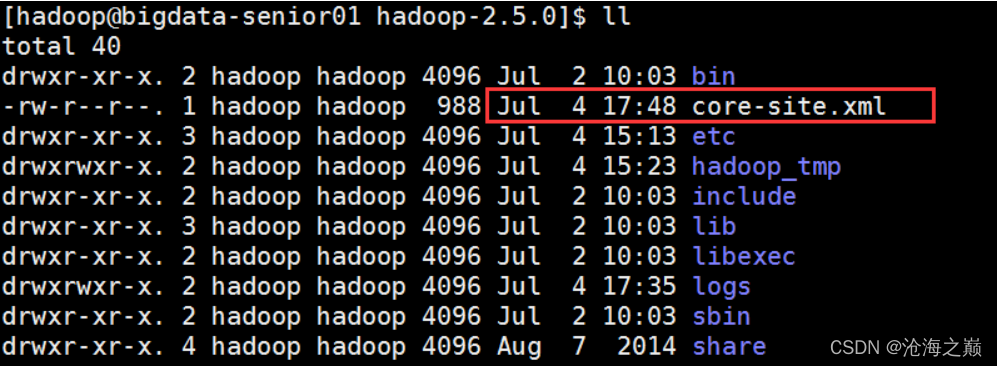
上传本地文件到HDFS上
[hadoop@bigdata-senior01 hadoop-2.7.2]$ ${HADOOP_HOME}/bin/hdfs dfs -put ${HADOOP_HOME}/etc/hadoop/core-site.xml /demo1
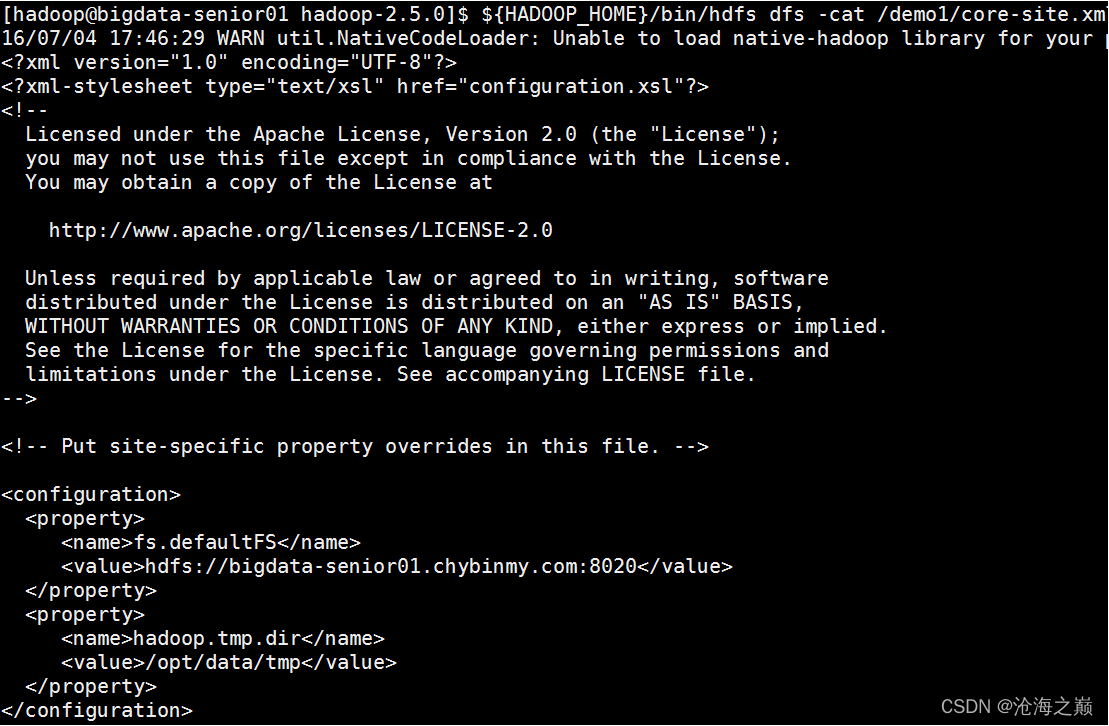
读取HDFS上的文件内容
[hadoop@bigdata-senior01 hadoop-2.7.2]$ ${HADOOP_HOME}/bin/hdfs dfs -cat /demo1/core-site.xml
从HDFS上下载文件到本地
[hadoop@bigdata-senior01 hadoop-2.7.2]$ bin/hdfs dfs -get /demo1/core-site.xml
配置、启动YARN
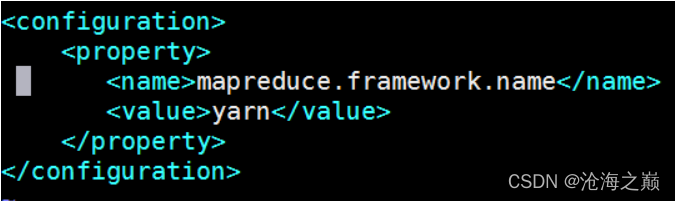
1、 配置mapred-site.xml
默认没有mapred-site.xml文件,但是有个mapred-site.xml.template配置模板文件。复制模板生成mapred-site.xml。
cd /opt/modules/hadoop-2.7.2
cp etc/hadoop/mapred-site.xml.template etc/hadoop/mapred-site.xml
添加配置如下:
<property>
<name>mapreduce.framework.name</name>
<value>yarn</value>
</property>
指定mapreduce运行在yarn框架上。
2、 配置yarn-site.xml
添加配置如下:
<property>
<name>yarn.nodemanager.aux-services</name>
<value>mapreduce_shuffle</value>
</property>
<property>
<name>yarn.resourcemanager.hostname</name>
<value>dss</value>
</property>
yarn.nodemanager.aux-services配置了yarn的默认混洗方式,选择为mapreduce的默认混洗算法。
yarn.resourcemanager.hostname指定了Resourcemanager运行在哪个节点上。
3、 启动Resourcemanager
[hadoop@bigdata-senior01 hadoop-2.7.2]$ ${HADOOP_HOME}/sbin/yarn-daemon.sh start resourcemanager

4、 启动nodemanager
[hadoop@bigdata-senior01 hadoop-2.7.2]$ ${HADOOP_HOME}/sbin/yarn-daemon.sh start nodemanager

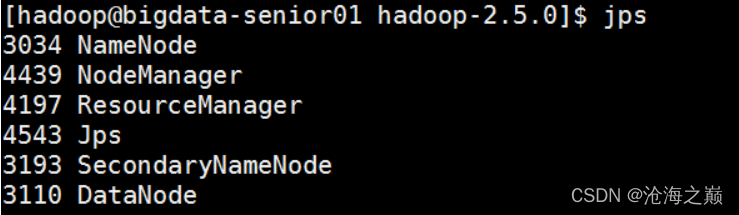
5、 查看是否启动成功
[hadoop@bigdata-senior01 hadoop-2.7.2]$ jps
3034 NameNode
4439 NodeManager
4197 ResourceManager
4543 Jps
3193 SecondaryNameNode
3110 DataNode
可以看到ResourceManager、NodeManager已经启动成功了。
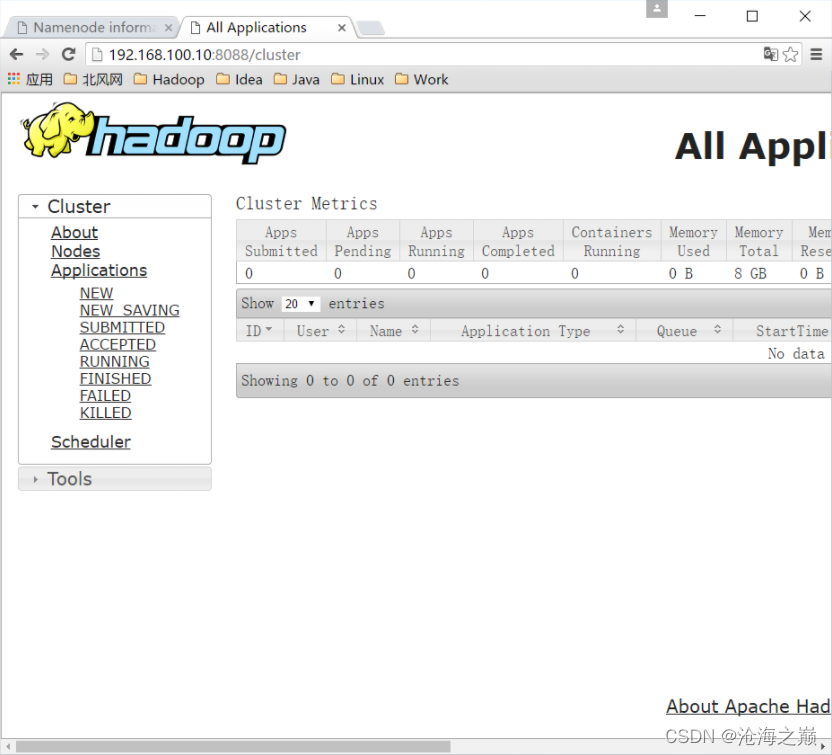
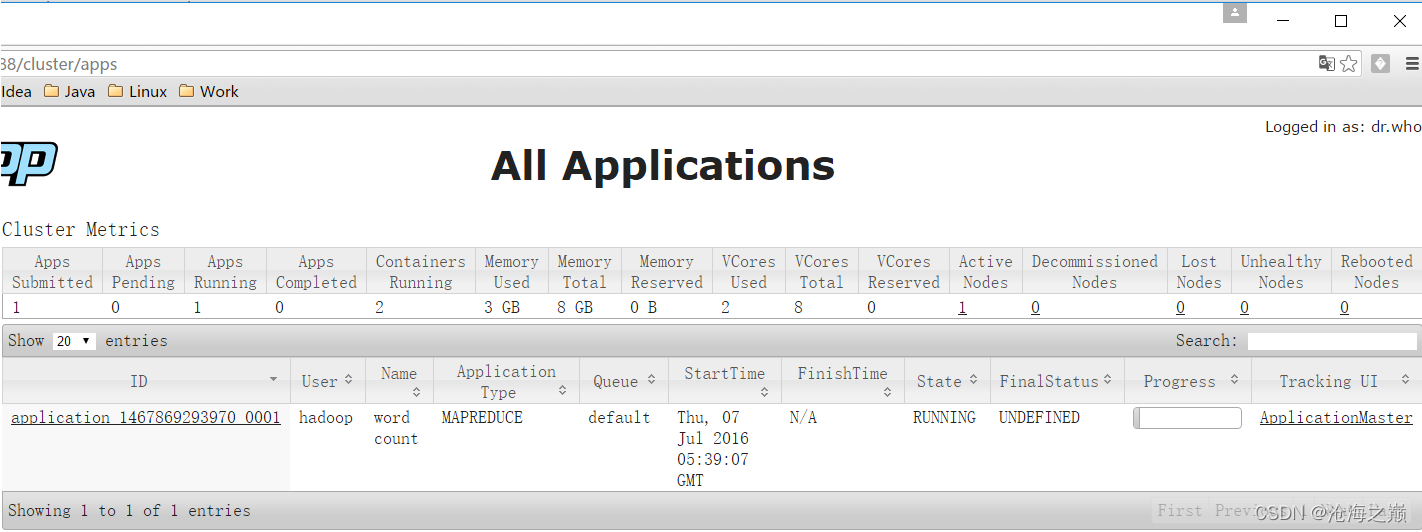
6、 YARN的Web页面
现在可以打开:localhost:8088,但是需要关闭selinux才能在本机打开vmware workstation中的服务
YARN的Web客户端端口号是8088,通过http://192.168.100.10:8088/可以查看。
运行MapReduce Job
在Hadoop的share目录里,自带了一些jar包,里面带有一些mapreduce实例小例子,位置在share/hadoop/mapreduce/hadoop-mapreduce-examples-2.7.2.jar,可以运行这些例子体验刚搭建好的Hadoop平台,我们这里来运行最经典的WordCount实例。
1、 创建测试用的Input文件
创建输入目录:
[hadoop@bigdata-senior01 hadoop-2.7.2]$ bin/hdfs dfs -mkdir -p /wordcountdemo/input
创建原始文件:
在本地/opt/data目录创建一个文件wc.input,内容如下。
将wc.input文件上传到HDFS的/wordcountdemo/input目录中:
[hadoop@bigdata-senior01 hadoop-2.7.2]$ bin/hdfs dfs -put /opt/data/wc.input /wordcountdemo/input

2、 运行WordCount MapReduce Job
[hadoop@bigdata-senior01 hadoop-2.7.2]$ bin/yarn jar share/hadoop/mapreduce/hadoop-mapreduce-examples-2.7.2.jar wordcount /wordcountdemo/input /wordcountdemo/output
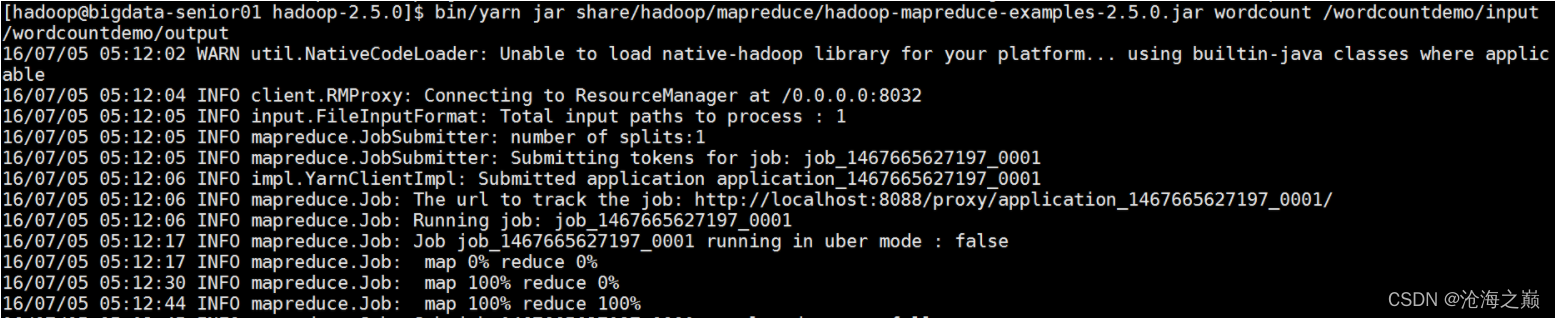
[hadoop@localhost hadoop-2.7.2]$ bin/yarn jar share/hadoop/mapreduce/hadoop-mapreduce-examples-2.7.2.jar wordcount /wordcountdemo/input /wordcountdemo/output
22/01/04 22:20:05 INFO client.RMProxy: Connecting to ResourceManager at bigdata-senior01.chybinmy.com/192.168.100.20:8032
22/01/04 22:20:06 INFO input.FileInputFormat: Total input files to process : 1
22/01/04 22:20:07 INFO mapreduce.JobSubmitter: number of splits:1
22/01/04 22:20:07 INFO mapreduce.JobSubmitter: Submitting tokens for job: job_1641363392087_0001
22/01/04 22:20:08 INFO impl.YarnClientImpl: Submitted application application_1641363392087_0001
22/01/04 22:20:08 INFO mapreduce.Job: The url to track the job: http://bigdata-senior01.chybinmy.com:8088/proxy/application_1641363392087_0001/
22/01/04 22:20:08 INFO mapreduce.Job: Running job: job_1641363392087_0001
22/01/04 22:20:14 INFO mapreduce.Job: Job job_1641363392087_0001 running in uber mode : false
22/01/04 22:20:14 INFO mapreduce.Job:  map 0% reduce 0%
22/01/04 22:20:19 INFO mapreduce.Job:  map 100% reduce 0%
22/01/04 22:20:24 INFO mapreduce.Job:  map 100% reduce 100%
22/01/04 22:20:25 INFO mapreduce.Job: Job job_1641363392087_0001 completed successfully
22/01/04 22:20:25 INFO mapreduce.Job: Counters: 49
        File System Counters
                FILE: Number of bytes read=94
                FILE: Number of bytes written=316115
                FILE: Number of read operations=0
                FILE: Number of large read operations=0
                FILE: Number of write operations=0
                HDFS: Number of bytes read=206
                HDFS: Number of bytes written=60
                HDFS: Number of read operations=6
                HDFS: Number of large read operations=0
                HDFS: Number of write operations=2
        Job Counters
                Launched map tasks=1
                Launched reduce tasks=1
                Data-local map tasks=1
                Total time spent by all maps in occupied slots (ms)=2534
                Total time spent by all reduces in occupied slots (ms)=2356
                Total time spent by all map tasks (ms)=2534
                Total time spent by all reduce tasks (ms)=2356
                Total vcore-milliseconds taken by all map tasks=2534
                Total vcore-milliseconds taken by all reduce tasks=2356
                Total megabyte-milliseconds taken by all map tasks=2594816
                Total megabyte-milliseconds taken by all reduce tasks=2412544
        Map-Reduce Framework
                Map input records=4
                Map output records=11
                Map output bytes=115
                Map output materialized bytes=94
                Input split bytes=135
                Combine input records=11
                Combine output records=7
                Reduce input groups=7
                Reduce shuffle bytes=94
                Reduce input records=7
                Reduce output records=7
                Spilled Records=14
                Shuffled Maps =1
                Failed Shuffles=0
                Merged Map outputs=1
                GC time elapsed (ms)=121
                CPU time spent (ms)=1100
                Physical memory (bytes) snapshot=426364928
                Virtual memory (bytes) snapshot=4207398912
                Total committed heap usage (bytes)=298844160
        Shuffle Errors
                BAD_ID=0
                CONNECTION=0
                IO_ERROR=0
                WRONG_LENGTH=0
                WRONG_MAP=0
                WRONG_REDUCE=0
        File Input Format Counters
                Bytes Read=71
        File Output Format Counters
                Bytes Written=60
[hadoop@localhost hadoop-2.7.2]$ bin/hdfs dfs -ls /wordcountdemo/output
Found 2 items
-rw-r--r--   1 hadoop supergroup          0 2022-01-04 22:20 /wordcountdemo/output/_SUCCESS
-rw-r--r--   1 hadoop supergroup         60 2022-01-04 22:20 /wordcountdemo/output/part-r-00000
[hadoop@localhost hadoop-2.7.2]$
3、 查看输出结果目录
[hadoop@bigdata-senior01 hadoop-2.7.2]$ bin/hdfs dfs -ls /wordcountdemo/output
-rw-r--r-- 1 hadoop supergroup 0 2016-07-05 05:12 /wordcountdemo/output/_SUCCESS
-rw-r--r-- 1 hadoop supergroup 60 2016-07-05 05:12 /wordcountdemo/output/part-r-00000

output目录中有两个文件,_SUCCESS文件是空文件,有这个文件说明Job执行成功。
part-r-00000文件是结果文件,其中-r-说明这个文件是Reduce阶段产生的结果,mapreduce程序执行时,可以没有reduce阶段,但是肯定会有map阶段,如果没有reduce阶段这个地方有是-m-。
一个reduce会产生一个part-r-开头的文件。
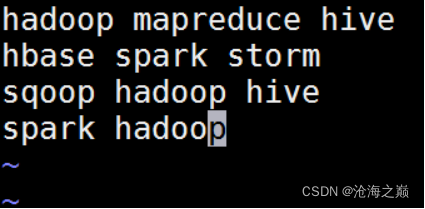
查看输出文件内容。
[hadoop@bigdata-senior01 hadoop-2.7.2]$ bin/hdfs dfs -cat /wordcountdemo/output/part-r-00000
hadoop 3
hbase 1
hive 2
mapreduce 1
spark 2
sqoop 1
storm 1
结果是按照键值排好序的。
停止Hadoop
[hadoop@bigdata-senior01 hadoop-2.7.2]$ sbin/hadoop-daemon.sh stop namenode
stopping namenode
[hadoop@bigdata-senior01 hadoop-2.7.2]$ sbin/hadoop-daemon.sh stop datanode
stopping datanode
[hadoop@bigdata-senior01 hadoop-2.7.2]$ sbin/yarn-daemon.sh stop resourcemanager
stopping resourcemanager
[hadoop@bigdata-senior01 hadoop-2.7.2]$ sbin/yarn-daemon.sh stop nodemanager
stopping nodemanager

Hadoop各个功能模块的理解
1、 HDFS模块
HDFS负责大数据的存储,通过将大文件分块后进行分布式存储方式,突破了服务器硬盘大小的限制,解决了单台机器无法存储大文件的问题,HDFS是个相对独立的模块,可以为YARN提供服务,也可以为HBase等其他模块提供服务。
2、 YARN模块
YARN是一个通用的资源协同和任务调度框架,是为了解决Hadoop1.x中MapReduce里NameNode负载太大和其他问题而创建的一个框架。
YARN是个通用框架,不止可以运行MapReduce,还可以运行Spark、Storm等其他计算框架。
3、 MapReduce模块
MapReduce是一个计算框架,它给出了一种数据处理的方式,即通过Map阶段、Reduce阶段来分布式地流式处理数据。它只适用于大数据的离线处理,对实时性要求很高的应用不适用。
开启历史服务
历史服务介绍
Hadoop开启历史服务可以在web页面上查看Yarn上执行job情况的详细信息。可以通过历史服务器查看已经运行完的Mapreduce作业记录,比如用了多少个Map、用了多少个Reduce、作业提交时间、作业启动时间、作业完成时间等信息。
开启历史服务
[hadoop@bigdata-senior01 hadoop-2.7.2]$ sbin/mr-jobhistory-daemon.sh start historyserver
开启后,可以通过Web页面查看历史服务器:
http://bigdata-senior01.chybinmy.com:19888/
Web查看job执行历史
1、 运行一个mapreduce任务
[hadoop@bigdata-senior01 hadoop-2.7.2]$ bin/yarn jar share/hadoop/mapreduce/hadoop-mapreduce-examples-2.7.2.jar wordcount /wordcountdemo/input /wordcountdemo/output1
2、 job执行中
3、 查看job历史
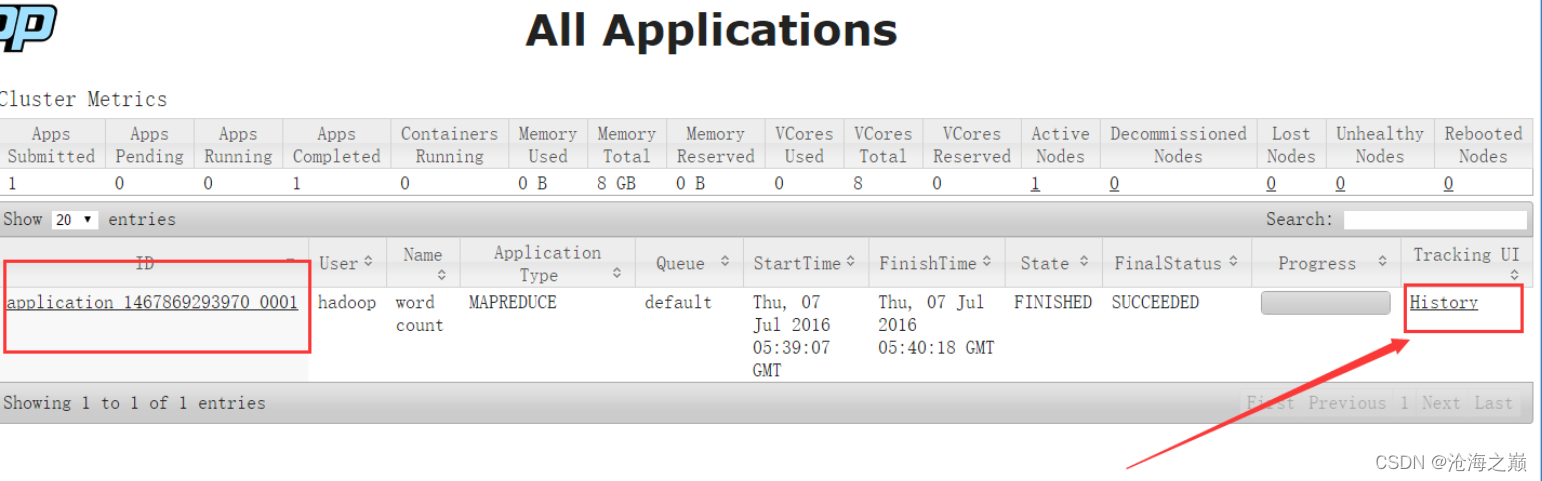
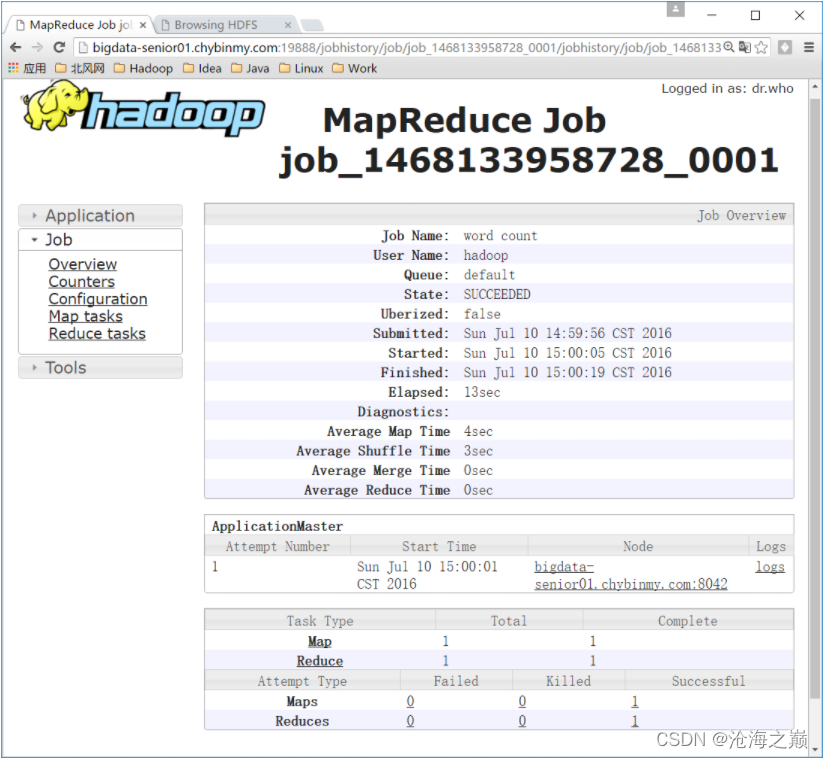
历史服务器的Web端口默认是19888,可以查看Web界面。
但是在上面所显示的某一个Job任务页面的最下面,Map和Reduce个数的链接上,点击进入Map的详细信息页面,再查看某一个Map或者Reduce的详细日志是看不到的,是因为没有开启日志聚集服务。
开启日志聚集
4、 日志聚集介绍
MapReduce是在各个机器上运行的,在运行过程中产生的日志存在于各个机器上,为了能够统一查看各个机器的运行日志,将日志集中存放在HDFS上,这个过程就是日志聚集。
5、 开启日志聚集
配置日志聚集功能:
Hadoop默认是不启用日志聚集的。在yarn-site.xml文件里配置启用日志聚集。
<property>
<name>yarn.log-aggregation-enable</name>
<value>true</value>
</property>
<property>
<name>yarn.log-aggregation.retain-seconds</name>
<value>106800</value>
</property>
yarn.log-aggregation-enable:是否启用日志聚集功能。
yarn.log-aggregation.retain-seconds:设置日志保留时间,单位是秒。
将配置文件分发到其他节点:
[hadoop@bigdata-senior01 hadoop]$ scp /opt/modules/hadoop-2.7.2/etc/hadoop/yarn-site.xml bigdata-senior02.chybinmy.com:/opt/modules/hadoop-2.7.2/etc/hadoop/
[hadoop@bigdata-senior01 hadoop]$ scp /opt/modules/hadoop-2.7.2/etc/hadoop/yarn-site.xml bigdata-senior03.chybinmy.com:/opt/modules/hadoop-2.7.2/etc/hadoop/
重启Yarn进程:
[hadoop@bigdata-senior01 hadoop-2.7.2]$ sbin/stop-yarn.sh
[hadoop@bigdata-senior01 hadoop-2.7.2]$ sbin/start-yarn.sh
重启HistoryServer进程:
[hadoop@bigdata-senior01 hadoop-2.7.2]$ sbin/mr-jobhistory-daemon.sh stop historyserver
[hadoop@bigdata-senior01 hadoop-2.7.2]$ sbin/mr-jobhistory-daemon.sh start historyserver
6、 测试日志聚集
运行一个demo MapReduce,使之产生日志:
bin/yarn jar share/hadoop/mapreduce/hadoop-mapreduce-examples-2.7.2.jar wordcount /input /output1
查看日志:
运行Job后,就可以在历史服务器Web页面查看各个Map和Reduce的日志了。
Hadoop(2.7.2,Hadoop其他版本需自行编译Linkis) ,安装的机器必须支持执行 hdfs dfs -ls / 命令
[hadoop@bigdata-senior01 ~]$ hdfs dfs -ls /
Found 3 items
drwxr-xr-x   - hadoop supergroup          0 2022-01-04 22:14 /demo1
drwx------   - hadoop supergroup          0 2022-01-04 22:58 /tmp
drwxr-xr-x   - hadoop supergroup          0 2022-01-04 22:22 /wordcountdemo
https://blog.csdn.net/weixin_33955681/article/details/92958527)
第十部分、Hive安装部署
安装部署Hive
wget http://archive.apache.org/dist/hive/hive-2.3.3/apache-hive-2.3.3-bin.tar.gz
tar -zxvf apache-hive-2.3.3-bin.tar.gz -C /opt/modules
//修改包名
$ mv apache-hive-2.3.3-bin apache-hive-2.3.3

==配置hive的环境变量(root用户)==
vi /etc/profile

export HIVE_HOME="/opt/modules/apache-hive-2.3.3"
export HIVE_CONF_DIR="/opt/modules/apache-hive-2.3.3/conf"
在 export PATH后面添加 H I V E H O M E / b i n : ‘ ‘ ‘ e x p o r t P A T H = HIVE_HOME/bin: ```export PATH= HIVEHOME/bin:‘‘‘exportPATH=HIVE_HOME/bin:$PATH```
————————————————
版权声明:本文为CSDN博主「数据的星辰大海」的原创文章,遵循CC 4.0 BY-SA版权协议,转载请附上原文出处链接及本声明。
原文链接:https://blog.csdn.net/qq_37554565/article/details/90477492
配置hive-site.xml
- 使用hive-default.xml.template,创建hive-site.xml
//进入hive/conf文件夹下
$ cd apache-hive-2.3.3/conf/
//拷贝hive-default.xml.template ,重命名为 hive-site.xml
$ cp hive-default.xml.template hive-site.xml
————————————————
- 修改元数据数据库地址, javax.jdo.option.ConnectionURL;
//修改hive-site.xml配置
$ vi hive-site.xml
//1. 按 i 键,进入编辑状态
//2. 按 / 键,查找 javax.jdo.option.ConnectionURL
//修改如下
<property>
<name>javax.jdo.option.ConnectionURL</name>
<value>jdbc:mysql://localhost:3306/hive?autoReconnect=true&useUnicode=true&createDatabaseIfNotExist=true&characterEncoding=utf8&useSSL=false&serverTimezone=UTC</value>
</property>
————————————————
3. 修改元数据数据库驱动,javax.jdo.option.ConnectionDriverName;
// 按 / 键,查找 javax.jdo.option.ConnectionDriverName

//修改如下
<property>
    <name>javax.jdo.option.ConnectionDriverName</name>
    <value>com.mysql.jdbc.Driver</value>
</property>
————————————————
4. 修改元数据数据库用户名,javax.jdo.option.ConnectionUserName;
//按 / 键,查找 javax.jdo.option.ConnectionUserName

//修改如下
<property>
    <name>javax.jdo.option.ConnectionUserName</name>
    <value>root</value>
</property>
————————————————
5. 元数据数据库登陆密码,javax.jdo.option.ConnectionPassword;
//按 / 键, 查找  javax.jdo.option.ConnectionPassword

//修改如下
<property>
    <name>javax.jdo.option.ConnectionPassword</name>
    <value>abcd123</value>
</property>
————————————————
6. 修改hive数据仓库存储地址(在hdfs上具体存储地址),hive.metastore.warehouse.dir;
//按 / 键,查找 hive.metastore.warehouse.dir

//默认 /user/hive/warehouse ,这里不进行调整
//修改如下
<property>
    <name>hive.metastore.warehouse.dir</name>
    <value>/user/hive/warehouse</value>
</property>
————————————————
7. 配置其他路径;
//1. 配置 hive.querylog.location

//修改如下
<property>
    <name>hive.querylog.location</name>
    <value>/opt/tmp/hive</value>
</property>


//2. 配置 hive.server2.logging.operation.log.location

//修改如下
<property>
    <name>hive.server2.logging.operation.log.location</name>
    <value>/opt/tmp/hive/operation_logs</value>
</property>

//3. 配置 hive.exec.local.scratchdir????

//修改如下
<property>
    <name>hive.exec.local.scratchdir</name>
    <value>/opt/tmp/hive</value>
</property>

//4. 配置 hive.downloaded.resources.dir

//修改如下
<property>
    <name>hive.downloaded.resources.dir</name>
    <value>/opt/tmp/_resources</value>
</property>
————————————————
配置hive-log4j2.properties错误日志
拷贝 hive-log4j2.properties.template ,并命名为 hive-log4j2.properties
//按 esc 键,退出编辑;
//按 wq 键,保存编辑;

//查看 /conf
$ ll

//拷贝 hive-log4j2.properties.template ,并命名为 hive-log4j2.properties
$ cp hive-log4j2.properties.template hive-log4j2.properties

//编辑 hive-log4j2.properties
$ vi hive-log4j2.properties

//按 i 键,进入编辑状态
//配置输出log文件
property.hive.log.dir = /opt/tmp/hive/operation_logs
————————————————
修改hive-log4j2.properties,配置hive的log
配置下面的参数(如果没有logs目录,在hive根目录下创建它
修改hive-env.sh
cp hive-env.sh.template hive-env.sh
因为Hive使用了 Hadoop, 需要在 hive-env.sh 文件中指定 Hadoop 安装路径:
vim hive-env.sh
在打开的配置文件中,添加如下几行:
export JAVA_HOME=/opt/modules/jdk1.8.0_261/
export HADOOP_HOME=/opt/modules/hadoop-2.7.2/
export HADOOP_CONF_DIR=$HADOOP_HOME/etc/hadoop
export HIVE_HOME=/opt/modules/apache-hive-2.3.3
export HIVE_CONF_DIR=$HIVE_HOME/conf
export HIVE_AUX_JARS_PATH=$HIVE_HOME/lib
初始化hive元数据
- 初始化schema,schematool -dbType mysql -initSchema;
//使用 schematool, 初始化 schema

[hadoop@bigdata-senior01 apache-hive-2.3.3]$ pwd
/opt/modules/apache-hive-2.3.3
[hadoop@bigdata-senior01 modules]$ cp mysql-connector-java-5.1.49.jar apache-hive-2.3.3/lib/

[hadoop@bigdata-senior01 modules]$ ll apache-hive-2.3.3/lib/mysql*
-rw-r--r-- 1 hadoop hadoop 1006904 Jan  4 22:53 apache-hive-2.3.3/lib/mysql-connector-java-5.1.49.jar
-rw-r--r-- 1 hadoop hadoop    7954 Dec 19  2016 apache-hive-2.3.3/lib/mysql-metadata-storage-0.9.2.jar
[hadoop@bigdata-senior01 modules]$

[hadoop@bigdata-senior01 apache-hive-2.3.3]$ bin/schematool -dbType mysql -initSchema
SLF4J: Class path contains multiple SLF4J bindings.
SLF4J: Found binding in [jar:file:/opt/modules/apache-hive-2.3.3/lib/log4j-slf4j-impl-2.6.2.jar!/org/slf4j/impl/StaticLoggerBinder.class]
SLF4J: Found binding in [jar:file:/opt/modules/hadoop-2.8.5/share/hadoop/common/lib/slf4j-log4j12-1.7.10.jar!/org/slf4j/impl/StaticLoggerBinder.class]
SLF4J: See http://www.slf4j.org/codes.html#multiple_bindings for an explanation.
SLF4J: Actual binding is of type [org.apache.logging.slf4j.Log4jLoggerFactory]
Metastore connection URL:        jdbc:mysql://localhost:3306/hive?autoReconnect=true&useUnicode=true&createDatabaseIfNotExist=true&characterEncoding=utf8&useSSL=false&serverTimezone=UTC
Metastore Connection Driver :    com.mysql.jdbc.Driver
Metastore connection User:       root
Starting metastore schema initialization to 2.3.0
Initialization script hive-schema-2.3.0.mysql.sql
Initialization script completed
schemaTool completed
[hadoop@bigdata-senior01 apache-hive-2.3.3]$


[hadoop@hadoop000 apache-hive-2.3.3]$
处理Driver异常
-
- 补充初始化 schema 时,会出现Underlying cause: java.lang.ClassNotFoundException: com.mysql.jdbc.Driver异常,这里是因为缺少mysql连接驱动,这里使用 mysql-connector-java 5.1.38;
//下载mysql-connector的jar包
cd /opt/modules/apache-hive-2.3.3/lib
wget
[hadoop@hadoop000 lib]$ wget http://central.maven.org/maven2/mysql/mysql-connector-java/5.1.38/mysql-connector-java-5.1.38.


//检查mysql驱动是否下载完成
[hadoop@localhost lib]$ ll | grep mysql
-rw-rw-r--. 1 hadoop hadoop   983911 Dec 16  2015 mysql-connector-java-5.1.38.jar
-rw-r--r--. 1 hadoop hadoop     7954 Dec 20  2016 mysql-metadata-storage-0.9.2.jar
再次执行初始化,出现 schemaTool completed ,说明初始化成功;
————————————————
3. 登录mysql,查看初始化后的hive库
//登录mysql
# mysql -uroot -pabcd123


//查看数据库
mysql> show databases;
+--------------------+
| Database           |
+--------------------+
| information_schema |
| hive               |
| mysql              |
| performance_schema |
| sys                |
+--------------------+
5 rows in set (0.00 sec)

//使用 hive
mysql> use hive;
Reading table information for completion of table and column names
You can turn off this feature to get a quicker startup with -A

Database changed

//查看hive下,所有表,发现是 57 张,说明初始化成功
mysql> show tables;
+---------------------------+
| Tables_in_hive            |
+---------------------------+
| AUX_TABLE                 |
| BUCKETING_COLS            |
| CDS                       |
| COLUMNS_V2                |
| COMPACTION_QUEUE          |
| COMPLETED_COMPACTIONS     |
| COMPLETED_TXN_COMPONENTS  |
| DATABASE_PARAMS           |
| DBS                       |
| DB_PRIVS                  |
| DELEGATION_TOKENS         |
| FUNCS                     |
| FUNC_RU                   |
| GLOBAL_PRIVS              |
| HIVE_LOCKS                |
| IDXS                      |
| INDEX_PARAMS              |
| KEY_CONSTRAINTS           |
| MASTER_KEYS               |
| NEXT_COMPACTION_QUEUE_ID  |
| NEXT_LOCK_ID              |
| NEXT_TXN_ID               |
| NOTIFICATION_LOG          |
| NOTIFICATION_SEQUENCE     |
| NUCLEUS_TABLES            |
| PARTITIONS                |
| PARTITION_EVENTS          |
| PARTITION_KEYS            |
| PARTITION_KEY_VALS        |
| PARTITION_PARAMS          |
| PART_COL_PRIVS            |
| PART_COL_STATS            |
| PART_PRIVS                |
| ROLES                     |
| ROLE_MAP                  |
| SDS                       |
| SD_PARAMS                 |
| SEQUENCE_TABLE            |
| SERDES                    |
| SERDE_PARAMS              |
| SKEWED_COL_NAMES          |
| SKEWED_COL_VALUE_LOC_MAP  |
| SKEWED_STRING_LIST        |
| SKEWED_STRING_LIST_VALUES |
| SKEWED_VALUES             |
| SORT_COLS                 |
| TABLE_PARAMS              |
| TAB_COL_STATS             |
| TBLS                      |
| TBL_COL_PRIVS             |
| TBL_PRIVS                 |
| TXNS                      |
| TXN_COMPONENTS            |
| TYPES                     |
| TYPE_FIELDS               |
| VERSION                   |
| WRITE_SET                 |
+---------------------------+
57 rows in set (0.00 sec)
————————————————
启动hive
- 使用hiveserver2启动hive,启动前需要修改hadoop代理访问权限:
找到hadoop的core-site.xml,添加如下配置:
[hadoop@bigdata-senior01 hadoop]$ pwd
/opt/modules/hadoop-2.8.5/etc/hadoop
[hadoop@bigdata-senior01 hadoop]$ vim core-site.xml


<property>
  <name>hadoop.proxyuser.hadoop.hosts</name>
  <value>*</value>
</property>
<property>
  <name>hadoop.proxyuser.hadoop.groups</name>
  <value>*</value>
</property>
————————————————
2. hive的访问方式分为两种:
1). beeline,该方式仅支持本地机器进行操作;
   启动方式如下:$ bin/beeline -u jdbc:hive2://127.0.0.1:10000 -n hadoop

   -n : 代理用户

   -u : 请求地址
2). hiveserver2,该方式可提供不同的机器进行调用;
   启动方式如下:$ bin/hiveservice2

   查看是否已开放端口:netstat -ant | grep 10000
[hadoop@bigdata-senior01 apache-hive-2.3.3]$ pwd
/opt/modules/apache-hive-2.3.3
[hadoop@bigdata-senior01 apache-hive-2.3.3]$ bin/hiveserver2
which: no hbase in (/opt/modules/hadoop-2.8.5/bin:/opt/modules/hadoop-2.8.5/sbin:/opt/modules/jdk1.8.0_261/bin:/usr/local/bin:/bin:/usr/bin:/usr/local/sbin:/usr/sbin:/opt/mysql/bin:/home/hadoop/.local/bin:/home/hadoop/bin:/opt/modules/jdk1.8.0_261//bin:/opt/modules/hadoop-2.8.5//bin:/opt/modules/hadoop-2.8.5//sbin)
2022-01-04 22:58:41: Starting HiveServer2
SLF4J: Class path contains multiple SLF4J bindings.
SLF4J: Found binding in [jar:file:/opt/modules/apache-hive-2.3.3/lib/log4j-slf4j-impl-2.6.2.jar!/org/slf4j/impl/StaticLoggerBinder.class]
SLF4J: Found binding in [jar:file:/opt/modules/hadoop-2.8.5/share/hadoop/common/lib/slf4j-log4j12-1.7.10.jar!/org/slf4j/impl/StaticLoggerBinder.class]
SLF4J: See http://www.slf4j.org/codes.html#multiple_bindings for an explanation.
SLF4J: Actual binding is of type [org.apache.logging.slf4j.Log4jLoggerFactory]
————————————————
Hive(2.3.3,Hive其他版本需自行编译Linkis),安装的机器必须支持执行hive -e "show databases"命令
[hadoop@bigdata-senior01 apache-hive-2.3.3]$ hive -e "show databases"
which: no hbase in (/opt/modules/apache-hive-2.3.3/bin:/opt/modules/hadoop-2.8.5/bin:/opt/modules/hadoop-2.8.5/sbin:/opt/modules/jdk1.8.0_261/bin:/opt/modules/hadoop-2.8.5/bin:/opt/modules/hadoop-2.8.5/sbin:/opt/modules/jdk1.8.0_261/bin:/usr/local/bin:/usr/bin:/usr/local/sbin:/usr/sbin:/opt/mysql/bin:/home/hadoop/.local/bin:/home/hadoop/bin:/opt/modules/jdk1.8.0_261//bin:/opt/modules/hadoop-2.8.5//bin:/opt/modules/hadoop-2.8.5//sbin:/opt/mysql/bin)
SLF4J: Class path contains multiple SLF4J bindings.
SLF4J: Found binding in [jar:file:/opt/modules/apache-hive-2.3.3/lib/log4j-slf4j-impl-2.6.2.jar!/org/slf4j/impl/StaticLoggerBinder.class]
SLF4J: Found binding in [jar:file:/opt/modules/hadoop-2.8.5/share/hadoop/common/lib/slf4j-log4j12-1.7.10.jar!/org/slf4j/impl/StaticLoggerBinder.class]
SLF4J: See http://www.slf4j.org/codes.html#multiple_bindings for an explanation.
SLF4J: Actual binding is of type [org.apache.logging.slf4j.Log4jLoggerFactory]

Logging initialized using configuration in file:/opt/modules/apache-hive-2.3.3/conf/hive-log4j2.properties Async: true
参考
集群搭建–安装apache-hive-2.3.4
装Apache Hive-2.3.3
https://blog.csdn.net/weixin_33955681/article/details/92958527)
文章目录
- DSS部署流程
-
- 第一部分、 背景
- 第二部分、准备虚拟机、环境初始化
- 第三部分、创建hadoop用户
- 第四部分、配置JDK
- 第五部分 Scala部署
- 第六部分、安装MySQL5.7.25
- 第七部分、安装python3
- 第八部分、nginx【dss会自动安装】
- 第九部分、安装hadoop(伪分布式)
- 第十部分、Hive安装部署
- 第十一部分、Spark on Yarn部署
- 第十二部分、DSS一键安装
- 第十三部分、帮助
第十一部分、Spark on Yarn部署
相关配置
tar xf spark-2.3.2-bin-hadoop2.7.tgz
cd /opt/modules/spark-2.3.2-bin-hadoop2.7/conf
更改配置文件
cp spark-env.sh.template spark-env.sh
cp slaves.template slaves

vi slaves
加入localhost

vi spark-env.sh
export JAVA_HOME=/opt/modules/jdk1.8.0_261
export SPARK_HOME=/opt/modules/spark-2.3.2-bin-hadoop2.7
#Spark主节点的IP
export SPARK_MASTER_IP=hadoop
#Spark主节点的端口号
export SPARK_MASTER_PORT=7077

启动:
cd /opt/modules/spark-2.3.2-bin-hadoop2.7/sbin
./start-all.sh


#vim /etc/profile
#添加spark的环境变量,加如PATH下、export出来
#source /etc/profile

export SPARK_HOME="/opt/modules/spark-2.3.2-bin-hadoop2.7"
export SPARK_MASTER_IP=master
export SPARK_EXECUTOR_MEMORY=1G
export PATH=$SPARK_HOME/bin:$PATH
操作记录如下
[hadoop@bigdata-senior01 ~]$ cd /opt/modules/
[hadoop@bigdata-senior01 modules]$ ll
total 1478576
drwxrwxr-x 10 hadoop hadoop       184 Jan  4 22:41 apache-hive-2.3.3
-rw-r--r--  1 hadoop hadoop 232229830 Jan  4 21:41 apache-hive-2.3.3-bin.tar.gz
drwxr-xr-x 10 hadoop hadoop       182 Jan  4 22:14 hadoop-2.8.5
-rw-r--r--  1 hadoop hadoop 246543928 Jan  4 21:41 hadoop-2.8.5.tar.gz
drwxr-xr-x  8 hadoop hadoop       273 Jun 17  2020 jdk1.8.0_261
-rw-r--r--  1 hadoop hadoop 143111803 Jan  4 21:41 jdk-8u261-linux-x64.tar.gz
drwxr-xr-x  2 root   root           6 Jan  4 22:29 mysql-5.7.25-linux-glibc2.12-x86_64
-rw-r--r--  1 root   root   644862820 Jan  4 22:27 mysql-5.7.25-linux-glibc2.12-x86_64.tar.gz
-rw-r--r--  1 hadoop hadoop   1006904 Jan  4 21:41 mysql-connector-java-5.1.49.jar
-rw-r--r--  1 hadoop hadoop  20415505 Jan  4 21:41 scala-2.12.7.tgz
-rw-r--r--  1 hadoop hadoop 225875602 Jan  4 21:41 spark-2.3.2-bin-hadoop2.7.tgz
[hadoop@bigdata-senior01 modules]$ pwd
/opt/modules
[hadoop@bigdata-senior01 modules]$ tar xf scala-2.12.7.tgz
[hadoop@bigdata-senior01 modules]$ ll
total 1478576
drwxrwxr-x 10 hadoop hadoop       184 Jan  4 22:41 apache-hive-2.3.3
-rw-r--r--  1 hadoop hadoop 232229830 Jan  4 21:41 apache-hive-2.3.3-bin.tar.gz
drwxr-xr-x 10 hadoop hadoop       182 Jan  4 22:14 hadoop-2.8.5
-rw-r--r--  1 hadoop hadoop 246543928 Jan  4 21:41 hadoop-2.8.5.tar.gz
drwxr-xr-x  8 hadoop hadoop       273 Jun 17  2020 jdk1.8.0_261
-rw-r--r--  1 hadoop hadoop 143111803 Jan  4 21:41 jdk-8u261-linux-x64.tar.gz
drwxr-xr-x  2 root   root           6 Jan  4 22:29 mysql-5.7.25-linux-glibc2.12-x86_64
-rw-r--r--  1 root   root   644862820 Jan  4 22:27 mysql-5.7.25-linux-glibc2.12-x86_64.tar.gz
-rw-r--r--  1 hadoop hadoop   1006904 Jan  4 21:41 mysql-connector-java-5.1.49.jar
drwxrwxr-x  6 hadoop hadoop        50 Sep 27  2018 scala-2.12.7
-rw-r--r--  1 hadoop hadoop  20415505 Jan  4 21:41 scala-2.12.7.tgz
-rw-r--r--  1 hadoop hadoop 225875602 Jan  4 21:41 spark-2.3.2-bin-hadoop2.7.tgz
[hadoop@bigdata-senior01 modules]$
[hadoop@bigdata-senior01 modules]$ cd scala-2.12.7/
[hadoop@bigdata-senior01 scala-2.12.7]$ ll
total 0
drwxrwxr-x 2 hadoop hadoop 162 Sep 27  2018 bin
drwxrwxr-x 4 hadoop hadoop  86 Sep 27  2018 doc
drwxrwxr-x 2 hadoop hadoop 244 Sep 27  2018 lib
drwxrwxr-x 3 hadoop hadoop  18 Sep 27  2018 man
[hadoop@bigdata-senior01 scala-2.12.7]$ pwd
/opt/modules/scala-2.12.7
[hadoop@bigdata-senior01 scala-2.12.7]$
[hadoop@bigdata-senior01 scala-2.12.7]$ vim /etc/profile
[hadoop@bigdata-senior01 scala-2.12.7]$ sudo vim /etc/profile
[hadoop@bigdata-senior01 scala-2.12.7]$ source /etc/profile
[hadoop@bigdata-senior01 scala-2.12.7]$ echo $SCALA_HOME
/opt/modules/scala-2.12.7
[hadoop@bigdata-senior01 scala-2.12.7]$ scala
Welcome to Scala 2.12.7 (Java HotSpot(TM) 64-Bit Server VM, Java 1.8.0_261).
Type in expressions for evaluation. Or try :help.

scala>

scala> [hadoop@bigdata-senior01 scala-2.12.7]$
[hadoop@bigdata-senior01 scala-2.12.7]$
[hadoop@bigdata-senior01 scala-2.12.7]$
[hadoop@bigdata-senior01 scala-2.12.7]$
[hadoop@bigdata-senior01 scala-2.12.7]$
[hadoop@bigdata-senior01 scala-2.12.7]$ cd ../
[hadoop@bigdata-senior01 modules]$ ll
total 1478576
drwxrwxr-x 10 hadoop hadoop       184 Jan  4 22:41 apache-hive-2.3.3
-rw-r--r--  1 hadoop hadoop 232229830 Jan  4 21:41 apache-hive-2.3.3-bin.tar.gz
drwxr-xr-x 10 hadoop hadoop       182 Jan  4 22:14 hadoop-2.8.5
-rw-r--r--  1 hadoop hadoop 246543928 Jan  4 21:41 hadoop-2.8.5.tar.gz
drwxr-xr-x  8 hadoop hadoop       273 Jun 17  2020 jdk1.8.0_261
-rw-r--r--  1 hadoop hadoop 143111803 Jan  4 21:41 jdk-8u261-linux-x64.tar.gz
drwxr-xr-x  2 root   root           6 Jan  4 22:29 mysql-5.7.25-linux-glibc2.12-x86_64
-rw-r--r--  1 root   root   644862820 Jan  4 22:27 mysql-5.7.25-linux-glibc2.12-x86_64.tar.gz
-rw-r--r--  1 hadoop hadoop   1006904 Jan  4 21:41 mysql-connector-java-5.1.49.jar
drwxrwxr-x  6 hadoop hadoop        50 Sep 27  2018 scala-2.12.7
-rw-r--r--  1 hadoop hadoop  20415505 Jan  4 21:41 scala-2.12.7.tgz
-rw-r--r--  1 hadoop hadoop 225875602 Jan  4 21:41 spark-2.3.2-bin-hadoop2.7.tgz
[hadoop@bigdata-senior01 modules]$ tar xf spark-2.3.2-bin-hadoop2.7.tgz
[hadoop@bigdata-senior01 modules]$ ll
total 1478576
drwxrwxr-x 10 hadoop hadoop       184 Jan  4 22:41 apache-hive-2.3.3
-rw-r--r--  1 hadoop hadoop 232229830 Jan  4 21:41 apache-hive-2.3.3-bin.tar.gz
drwxr-xr-x 10 hadoop hadoop       182 Jan  4 22:14 hadoop-2.8.5
-rw-r--r--  1 hadoop hadoop 246543928 Jan  4 21:41 hadoop-2.8.5.tar.gz
drwxr-xr-x  8 hadoop hadoop       273 Jun 17  2020 jdk1.8.0_261
-rw-r--r--  1 hadoop hadoop 143111803 Jan  4 21:41 jdk-8u261-linux-x64.tar.gz
drwxr-xr-x  2 root   root           6 Jan  4 22:29 mysql-5.7.25-linux-glibc2.12-x86_64
-rw-r--r--  1 root   root   644862820 Jan  4 22:27 mysql-5.7.25-linux-glibc2.12-x86_64.tar.gz
-rw-r--r--  1 hadoop hadoop   1006904 Jan  4 21:41 mysql-connector-java-5.1.49.jar
drwxrwxr-x  6 hadoop hadoop        50 Sep 27  2018 scala-2.12.7
-rw-r--r--  1 hadoop hadoop  20415505 Jan  4 21:41 scala-2.12.7.tgz
drwxrwxr-x 13 hadoop hadoop       211 Sep 16  2018 spark-2.3.2-bin-hadoop2.7
-rw-r--r--  1 hadoop hadoop 225875602 Jan  4 21:41 spark-2.3.2-bin-hadoop2.7.tgz
[hadoop@bigdata-senior01 modules]$ cd spark-2.3.2-bin-hadoop2.7/
[hadoop@bigdata-senior01 spark-2.3.2-bin-hadoop2.7]$ pwd
/opt/modules/spark-2.3.2-bin-hadoop2.7
[hadoop@bigdata-senior01 spark-2.3.2-bin-hadoop2.7]$
[hadoop@bigdata-senior01 spark-2.3.2-bin-hadoop2.7]$ cd /opt/modules/spark-2.3.2-bin-hadoop2.7/conf
[hadoop@bigdata-senior01 conf]$ cp spark-env.sh.template spark-env.sh
[hadoop@bigdata-senior01 conf]$ cp slaves.template slaves
[hadoop@bigdata-senior01 conf]$ vim slaves
[hadoop@bigdata-senior01 conf]$ vi spark-env.sh
[hadoop@bigdata-senior01 conf]$ cd ../
[hadoop@bigdata-senior01 spark-2.3.2-bin-hadoop2.7]$ ll
total 84
drwxrwxr-x 2 hadoop hadoop  4096 Sep 16  2018 bin
drwxrwxr-x 2 hadoop hadoop   264 Jan  4 23:33 conf
drwxrwxr-x 5 hadoop hadoop    50 Sep 16  2018 data
drwxrwxr-x 4 hadoop hadoop    29 Sep 16  2018 examples
drwxrwxr-x 2 hadoop hadoop 12288 Sep 16  2018 jars
drwxrwxr-x 3 hadoop hadoop    25 Sep 16  2018 kubernetes
-rw-rw-r-- 1 hadoop hadoop 18045 Sep 16  2018 LICENSE
drwxrwxr-x 2 hadoop hadoop  4096 Sep 16  2018 licenses
-rw-rw-r-- 1 hadoop hadoop 26366 Sep 16  2018 NOTICE
drwxrwxr-x 8 hadoop hadoop   240 Sep 16  2018 python
drwxrwxr-x 3 hadoop hadoop    17 Sep 16  2018 R
-rw-rw-r-- 1 hadoop hadoop  3809 Sep 16  2018 README.md
-rw-rw-r-- 1 hadoop hadoop   164 Sep 16  2018 RELEASE
drwxrwxr-x 2 hadoop hadoop  4096 Sep 16  2018 sbin
drwxrwxr-x 2 hadoop hadoop    42 Sep 16  2018 yarn
[hadoop@bigdata-senior01 spark-2.3.2-bin-hadoop2.7]$ cd conf
[hadoop@bigdata-senior01 conf]$ echo ${JAVA_HOME}
/opt/modules/jdk1.8.0_261
[hadoop@bigdata-senior01 conf]$
[hadoop@bigdata-senior01 conf]$ pwd
/opt/modules/spark-2.3.2-bin-hadoop2.7/conf
[hadoop@bigdata-senior01 conf]$
[hadoop@bigdata-senior01 conf]$ vim spark-env.sh
[hadoop@bigdata-senior01 conf]$ cd ../
[hadoop@bigdata-senior01 spark-2.3.2-bin-hadoop2.7]$ ll
total 84
drwxrwxr-x 2 hadoop hadoop  4096 Sep 16  2018 bin
drwxrwxr-x 2 hadoop hadoop   264 Jan  4 23:35 conf
drwxrwxr-x 5 hadoop hadoop    50 Sep 16  2018 data
drwxrwxr-x 4 hadoop hadoop    29 Sep 16  2018 examples
drwxrwxr-x 2 hadoop hadoop 12288 Sep 16  2018 jars
drwxrwxr-x 3 hadoop hadoop    25 Sep 16  2018 kubernetes
-rw-rw-r-- 1 hadoop hadoop 18045 Sep 16  2018 LICENSE
drwxrwxr-x 2 hadoop hadoop  4096 Sep 16  2018 licenses
-rw-rw-r-- 1 hadoop hadoop 26366 Sep 16  2018 NOTICE
drwxrwxr-x 8 hadoop hadoop   240 Sep 16  2018 python
drwxrwxr-x 3 hadoop hadoop    17 Sep 16  2018 R
-rw-rw-r-- 1 hadoop hadoop  3809 Sep 16  2018 README.md
-rw-rw-r-- 1 hadoop hadoop   164 Sep 16  2018 RELEASE
drwxrwxr-x 2 hadoop hadoop  4096 Sep 16  2018 sbin
drwxrwxr-x 2 hadoop hadoop    42 Sep 16  2018 yarn
[hadoop@bigdata-senior01 spark-2.3.2-bin-hadoop2.7]$ cd sbin
[hadoop@bigdata-senior01 sbin]$ ./start-all.sh
starting org.apache.spark.deploy.master.Master, logging to /opt/modules/spark-2.3.2-bin-hadoop2.7/logs/spark-hadoop-                                                                                org.apache.spark.deploy.master.Master-1-bigdata-senior01.chybinmy.com.out
localhost: Warning: Permanently added 'localhost' (ECDSA) to the list of known hosts.
hadoop@localhost's password:
hadoop@localhost's password: localhost: Permission denied, please try again.

hadoop@localhost's password: localhost: Permission denied, please try again.

localhost: Permission denied (publickey,gssapi-keyex,gssapi-with-mic,password).
[hadoop@bigdata-senior01 sbin]$
[hadoop@bigdata-senior01 sbin]$
[hadoop@bigdata-senior01 sbin]$ jps
18898 NodeManager
96757 Jps
17144 DataNode
18600 ResourceManager
16939 NameNode
21277 JobHistoryServer
17342 SecondaryNameNode
95983 Master
[hadoop@bigdata-senior01 sbin]$ vim /etc/profile
[hadoop@bigdata-senior01 sbin]$ sudo vim /etc/profile
[hadoop@bigdata-senior01 sbin]$ source /etc/profile
[hadoop@bigdata-senior01 sbin]$ ./start-all.sh
org.apache.spark.deploy.master.Master running as process 95983.  Stop it first.
hadoop@localhost's password:
localhost: starting org.apache.spark.deploy.worker.Worker, logging to /opt/modules/spark-2.3.2-bin-hadoop2.7/logs/sp                                                                                ark-hadoop-org.apache.spark.deploy.worker.Worker-1-bigdata-senior01.chybinmy.com.out
[hadoop@bigdata-senior01 sbin]$ cat /opt/modules/spark-2.3.2-bin-hadoop2.7/logs/spark-hadoop-org.apache.spark.deploy                                                                                .worker.Worker-1-bigdata-senior01.chybinmy.com.out
Spark Command: /opt/modules/jdk1.8.0_261/bin/java -cp /opt/modules/spark-2.3.2-bin-hadoop2.7/conf/:/opt/modules/spar                                                                                k-2.3.2-bin-hadoop2.7/jars/* -Xmx1g org.apache.spark.deploy.worker.Worker --webui-port 8081 spark://bigdata-senior01                                                                                .chybinmy.com:7077
========================================
2022-01-04 23:42:32 INFO  Worker:2612 - Started daemon with process name: [email protected]
2022-01-04 23:42:32 INFO  SignalUtils:54 - Registered signal handler for TERM
2022-01-04 23:42:32 INFO  SignalUtils:54 - Registered signal handler for HUP
2022-01-04 23:42:32 INFO  SignalUtils:54 - Registered signal handler for INT
2022-01-04 23:42:33 WARN  NativeCodeLoader:62 - Unable to load native-hadoop library for your platform... using buil                                                                                tin-java classes where applicable
2022-01-04 23:42:33 INFO  SecurityManager:54 - Changing view acls to: hadoop
2022-01-04 23:42:33 INFO  SecurityManager:54 - Changing modify acls to: hadoop
2022-01-04 23:42:33 INFO  SecurityManager:54 - Changing view acls groups to:
2022-01-04 23:42:33 INFO  SecurityManager:54 - Changing modify acls groups to:
2022-01-04 23:42:33 INFO  SecurityManager:54 - SecurityManager: authentication disabled; ui acls disabled; users  wi                                                                                th view permissions: Set(hadoop); groups with view permissions: Set(); users  with modify permissions: Set(hadoop);                                                                                 groups with modify permissions: Set()
2022-01-04 23:42:34 INFO  Utils:54 - Successfully started service 'sparkWorker' on port 46351.
2022-01-04 23:42:34 INFO  Worker:54 - Starting Spark worker 192.168.100.20:46351 with 2 cores, 2.7 GB RAM
2022-01-04 23:42:34 INFO  Worker:54 - Running Spark version 2.3.2
2022-01-04 23:42:34 INFO  Worker:54 - Spark home: /opt/modules/spark-2.3.2-bin-hadoop2.7
2022-01-04 23:42:35 INFO  log:192 - Logging initialized @4458ms
2022-01-04 23:42:35 INFO  Server:351 - jetty-9.3.z-SNAPSHOT, build timestamp: unknown, git hash: unknown
2022-01-04 23:42:35 INFO  Server:419 - Started @4642ms
2022-01-04 23:42:35 INFO  AbstractConnector:278 - Started ServerConnector@6de6ec17{HTTP/1.1,[http/1.1]}{0.0.0.0:8081                                                                                }
2022-01-04 23:42:35 INFO  Utils:54 - Successfully started service 'WorkerUI' on port 8081.
2022-01-04 23:42:35 INFO  ContextHandler:781 - Started o.s.j.s.ServletContextHandler@6cd8d218{/logPage,null,AVAILABL                                                                                E,@Spark}
2022-01-04 23:42:35 INFO  ContextHandler:781 - Started o.s.j.s.ServletContextHandler@265b9144{/logPage/json,null,AVA                                                                                ILABLE,@Spark}
2022-01-04 23:42:35 INFO  ContextHandler:781 - Started o.s.j.s.ServletContextHandler@460a8f36{/,null,AVAILABLE,@Spar                                                                                k}
2022-01-04 23:42:35 INFO  ContextHandler:781 - Started o.s.j.s.ServletContextHandler@732d2fc5{/json,null,AVAILABLE,@                                                                                Spark}
2022-01-04 23:42:35 INFO  ContextHandler:781 - Started o.s.j.s.ServletContextHandler@9864155{/static,null,AVAILABLE,                                                                                @Spark}
2022-01-04 23:42:35 INFO  ContextHandler:781 - Started o.s.j.s.ServletContextHandler@a5fd0ba{/log,null,AVAILABLE,@Sp                                                                                ark}
2022-01-04 23:42:35 INFO  WorkerWebUI:54 - Bound WorkerWebUI to 0.0.0.0, and started at http://bigdata-senior01.chyb                                                                                inmy.com:8081
2022-01-04 23:42:35 INFO  Worker:54 - Connecting to master bigdata-senior01.chybinmy.com:7077...
2022-01-04 23:42:35 INFO  ContextHandler:781 - Started o.s.j.s.ServletContextHandler@1c2b0b0e{/metrics/json,null,AVA                                                                                ILABLE,@Spark}
2022-01-04 23:42:35 INFO  TransportClientFactory:267 - Successfully created connection to bigdata-senior01.chybinmy.                                                                                com/192.168.100.20:7077 after 156 ms (0 ms spent in bootstraps)
2022-01-04 23:42:36 INFO  Worker:54 - Successfully registered with master spark://bigdata-senior01.chybinmy.com:7077
[hadoop@bigdata-senior01 sbin]$
[hadoop@bigdata-senior01 sbin]$
[hadoop@bigdata-senior01 sbin]$
访问地址:
http://192.168.100.20:8080/

http://192.168.100.20:8081/

Spark(支持2.0以上所有版本) ,安装的机器必须支持执行spark-sql -e “show databases” 命令
$
[hadoop@bigdata-senior01 sbin]$ spark-sql -e "show databases"
2022-01-04 23:49:13 WARN  NativeCodeLoader:62 - Unable to load native-hadoop library for your platform... using builtin-java classes where applicable
2022-01-04 23:49:14 INFO  HiveMetaStore:589 - 0: Opening raw store with implemenation class:org.apache.hadoop.hive.metastore.ObjectStore
2022-01-04 23:49:14 INFO  ObjectStore:289 - ObjectStore, initialize called
2022-01-04 23:49:15 INFO  Persistence:77 - Property hive.metastore.integral.jdo.pushdown unknown - will be ignored
2022-01-04 23:49:15 INFO  Persistence:77 - Property datanucleus.cache.level2 unknown - will be ignored
2022-01-04 23:49:18 INFO  ObjectStore:370 - Setting MetaStore object pin classes with hive.metastore.cache.pinobjtypes="Table,StorageDescriptor,SerDeInfo,Partition,Database,Type,FieldSchema,Order"
2022-01-04 23:49:20 INFO  Datastore:77 - The class "org.apache.hadoop.hive.metastore.model.MFieldSchema" is tagged as "embedded-only" so does not have its own datastore table.
2022-01-04 23:49:20 INFO  Datastore:77 - The class "org.apache.hadoop.hive.metastore.model.MOrder" is tagged as "embedded-only" so does not have its own datastore table.
2022-01-04 23:49:21 INFO  Datastore:77 - The class "org.apache.hadoop.hive.metastore.model.MFieldSchema" is tagged as "embedded-only" so does not have its own datastore table.
2022-01-04 23:49:21 INFO  Datastore:77 - The class "org.apache.hadoop.hive.metastore.model.MOrder" is tagged as "embedded-only" so does not have its own datastore table.
2022-01-04 23:49:21 INFO  MetaStoreDirectSql:139 - Using direct SQL, underlying DB is DERBY
2022-01-04 23:49:21 INFO  ObjectStore:272 - Initialized ObjectStore
2022-01-04 23:49:21 WARN  ObjectStore:6666 - Version information not found in metastore. hive.metastore.schema.verification is not enabled so recording the schema version 1.2.0
2022-01-04 23:49:21 WARN  ObjectStore:568 - Failed to get database default, returning NoSuchObjectException
2022-01-04 23:49:22 INFO  HiveMetaStore:663 - Added admin role in metastore
2022-01-04 23:49:22 INFO  HiveMetaStore:672 - Added public role in metastore
2022-01-04 23:49:22 INFO  HiveMetaStore:712 - No user is added in admin role, since config is empty
2022-01-04 23:49:22 INFO  HiveMetaStore:746 - 0: get_all_databases
2022-01-04 23:49:22 INFO  audit:371 - ugi=hadoop        ip=unknown-ip-addr      cmd=get_all_databases
2022-01-04 23:49:22 INFO  HiveMetaStore:746 - 0: get_functions: db=default pat=*
2022-01-04 23:49:22 INFO  audit:371 - ugi=hadoop        ip=unknown-ip-addr      cmd=get_functions: db=default pat=*
2022-01-04 23:49:22 INFO  Datastore:77 - The class "org.apache.hadoop.hive.metastore.model.MResourceUri" is tagged as "embedded-only" so does not have its own datastore table.
2022-01-04 23:49:23 INFO  SessionState:641 - Created HDFS directory: /tmp/hive/hadoop
2022-01-04 23:49:23 INFO  SessionState:641 - Created local directory: /tmp/17c2283a-5ee4-41a0-88b7-54b3ec12cd9f_resources
2022-01-04 23:49:23 INFO  SessionState:641 - Created HDFS directory: /tmp/hive/hadoop/17c2283a-5ee4-41a0-88b7-54b3ec12cd9f
2022-01-04 23:49:23 INFO  SessionState:641 - Created local directory: /tmp/hadoop/17c2283a-5ee4-41a0-88b7-54b3ec12cd9f
2022-01-04 23:49:23 INFO  SessionState:641 - Created HDFS directory: /tmp/hive/hadoop/17c2283a-5ee4-41a0-88b7-54b3ec12cd9f/_tmp_space.db
2022-01-04 23:49:23 INFO  SparkContext:54 - Running Spark version 2.3.2
2022-01-04 23:49:23 INFO  SparkContext:54 - Submitted application: SparkSQL::192.168.100.20
2022-01-04 23:49:23 INFO  SecurityManager:54 - Changing view acls to: hadoop
2022-01-04 23:49:23 INFO  SecurityManager:54 - Changing modify acls to: hadoop
2022-01-04 23:49:23 INFO  SecurityManager:54 - Changing view acls groups to:
2022-01-04 23:49:23 INFO  SecurityManager:54 - Changing modify acls groups to:
2022-01-04 23:49:23 INFO  SecurityManager:54 - SecurityManager: authentication disabled; ui acls disabled; users  with view permissions: Set(hadoop); groups with view permissions: Set(); users  with modify permissions: Set(hadoop); groups with modify permissions: Set()
2022-01-04 23:49:24 INFO  Utils:54 - Successfully started service 'sparkDriver' on port 37135.
2022-01-04 23:49:24 INFO  SparkEnv:54 - Registering MapOutputTracker
2022-01-04 23:49:24 INFO  SparkEnv:54 - Registering BlockManagerMaster
2022-01-04 23:49:24 INFO  BlockManagerMasterEndpoint:54 - Using org.apache.spark.storage.DefaultTopologyMapper for getting topology information
2022-01-04 23:49:24 INFO  BlockManagerMasterEndpoint:54 - BlockManagerMasterEndpoint up
2022-01-04 23:49:24 INFO  DiskBlockManager:54 - Created local directory at /tmp/blockmgr-e68cfdc9-adda-400b-beac-f4441481481c
2022-01-04 23:49:24 INFO  MemoryStore:54 - MemoryStore started with capacity 366.3 MB
2022-01-04 23:49:24 INFO  SparkEnv:54 - Registering OutputCommitCoordinator
2022-01-04 23:49:24 INFO  log:192 - Logging initialized @14831ms
2022-01-04 23:49:25 INFO  Server:351 - jetty-9.3.z-SNAPSHOT, build timestamp: unknown, git hash: unknown
2022-01-04 23:49:25 INFO  Server:419 - Started @15163ms
2022-01-04 23:49:25 INFO  AbstractConnector:278 - Started ServerConnector@7d0cd23c{HTTP/1.1,[http/1.1]}{0.0.0.0:4040}
2022-01-04 23:49:25 INFO  Utils:54 - Successfully started service 'SparkUI' on port 4040.
2022-01-04 23:49:25 INFO  ContextHandler:781 - Started o.s.j.s.ServletContextHandler@130cfc47{/jobs,null,AVAILABLE,@Spark}
2022-01-04 23:49:25 INFO  ContextHandler:781 - Started o.s.j.s.ServletContextHandler@4584304{/jobs/json,null,AVAILABLE,@Spark}
2022-01-04 23:49:25 INFO  ContextHandler:781 - Started o.s.j.s.ServletContextHandler@51888019{/jobs/job,null,AVAILABLE,@Spark}
2022-01-04 23:49:25 INFO  ContextHandler:781 - Started o.s.j.s.ServletContextHandler@19b5214b{/jobs/job/json,null,AVAILABLE,@Spark}
2022-01-04 23:49:25 INFO  ContextHandler:781 - Started o.s.j.s.ServletContextHandler@5fb3111a{/stages,null,AVAILABLE,@Spark}
2022-01-04 23:49:25 INFO  ContextHandler:781 - Started o.s.j.s.ServletContextHandler@4aaecabd{/stages/json,null,AVAILABLE,@Spark}
2022-01-04 23:49:25 INFO  ContextHandler:781 - Started o.s.j.s.ServletContextHandler@23bd0c81{/stages/stage,null,AVAILABLE,@Spark}
2022-01-04 23:49:25 INFO  ContextHandler:781 - Started o.s.j.s.ServletContextHandler@6889f56f{/stages/stage/json,null,AVAILABLE,@Spark}
2022-01-04 23:49:25 INFO  ContextHandler:781 - Started o.s.j.s.ServletContextHandler@231b35fb{/stages/pool,null,AVAILABLE,@Spark}
2022-01-04 23:49:25 INFO  ContextHandler:781 - Started o.s.j.s.ServletContextHandler@26da1ba2{/stages/pool/json,null,AVAILABLE,@Spark}
2022-01-04 23:49:25 INFO  ContextHandler:781 - Started o.s.j.s.ServletContextHandler@3820cfe{/storage,null,AVAILABLE,@Spark}
2022-01-04 23:49:25 INFO  ContextHandler:781 - Started o.s.j.s.ServletContextHandler@2407a36c{/storage/json,null,AVAILABLE,@Spark}
2022-01-04 23:49:25 INFO  ContextHandler:781 - Started o.s.j.s.ServletContextHandler@5ec9eefa{/storage/rdd,null,AVAILABLE,@Spark}
2022-01-04 23:49:25 INFO  ContextHandler:781 - Started o.s.j.s.ServletContextHandler@28b8f98a{/storage/rdd/json,null,AVAILABLE,@Spark}
2022-01-04 23:49:25 INFO  ContextHandler:781 - Started o.s.j.s.ServletContextHandler@3b4ef59f{/environment,null,AVAILABLE,@Spark}
2022-01-04 23:49:25 INFO  ContextHandler:781 - Started o.s.j.s.ServletContextHandler@22cb3d59{/environment/json,null,AVAILABLE,@Spark}
2022-01-04 23:49:25 INFO  ContextHandler:781 - Started o.s.j.s.ServletContextHandler@33e4b9c4{/executors,null,AVAILABLE,@Spark}
2022-01-04 23:49:25 INFO  ContextHandler:781 - Started o.s.j.s.ServletContextHandler@5cff729b{/executors/json,null,AVAILABLE,@Spark}
2022-01-04 23:49:25 INFO  ContextHandler:781 - Started o.s.j.s.ServletContextHandler@10d18696{/executors/threadDump,null,AVAILABLE,@Spark}
2022-01-04 23:49:25 INFO  ContextHandler:781 - Started o.s.j.s.ServletContextHandler@6b8b5020{/executors/threadDump/json,null,AVAILABLE,@Spark}
2022-01-04 23:49:25 INFO  ContextHandler:781 - Started o.s.j.s.ServletContextHandler@7d37ee0c{/static,null,AVAILABLE,@Spark}
2022-01-04 23:49:25 INFO  ContextHandler:781 - Started o.s.j.s.ServletContextHandler@67f946c3{/,null,AVAILABLE,@Spark}
2022-01-04 23:49:25 INFO  ContextHandler:781 - Started o.s.j.s.ServletContextHandler@21b51e59{/api,null,AVAILABLE,@Spark}
2022-01-04 23:49:25 INFO  ContextHandler:781 - Started o.s.j.s.ServletContextHandler@4f664bee{/jobs/job/kill,null,AVAILABLE,@Spark}
2022-01-04 23:49:25 INFO  ContextHandler:781 - Started o.s.j.s.ServletContextHandler@76563ae7{/stages/stage/kill,null,AVAILABLE,@Spark}
2022-01-04 23:49:25 INFO  SparkUI:54 - Bound SparkUI to 0.0.0.0, and started at http://bigdata-senior01.chybinmy.com:4040
2022-01-04 23:49:25 INFO  Executor:54 - Starting executor ID driver on host localhost
2022-01-04 23:49:25 INFO  Utils:54 - Successfully started service 'org.apache.spark.network.netty.NettyBlockTransferService' on port 43887.
2022-01-04 23:49:25 INFO  NettyBlockTransferService:54 - Server created on bigdata-senior01.chybinmy.com:43887
2022-01-04 23:49:25 INFO  BlockManager:54 - Using org.apache.spark.storage.RandomBlockReplicationPolicy for block replication policy
2022-01-04 23:49:25 INFO  BlockManagerMaster:54 - Registering BlockManager BlockManagerId(driver, bigdata-senior01.chybinmy.com, 43887, None)
2022-01-04 23:49:25 INFO  BlockManagerMasterEndpoint:54 - Registering block manager bigdata-senior01.chybinmy.com:43887 with 366.3 MB RAM, BlockManagerId(driver, bigdata-senior01.chybinmy.com, 43887, None)
2022-01-04 23:49:25 INFO  BlockManagerMaster:54 - Registered BlockManager BlockManagerId(driver, bigdata-senior01.chybinmy.com, 43887, None)
2022-01-04 23:49:25 INFO  BlockManager:54 - Initialized BlockManager: BlockManagerId(driver, bigdata-senior01.chybinmy.com, 43887, None)
2022-01-04 23:49:26 INFO  ContextHandler:781 - Started o.s.j.s.ServletContextHandler@35ac9ebd{/metrics/json,null,AVAILABLE,@Spark}
2022-01-04 23:49:26 INFO  SharedState:54 - Setting hive.metastore.warehouse.dir ('null') to the value of spark.sql.warehouse.dir ('file:/opt/modules/spark-2.3.2-bin-hadoop2.7/sbin/spark-warehouse').
2022-01-04 23:49:26 INFO  SharedState:54 - Warehouse path is 'file:/opt/modules/spark-2.3.2-bin-hadoop2.7/sbin/spark-warehouse'.
2022-01-04 23:49:26 INFO  ContextHandler:781 - Started o.s.j.s.ServletContextHandler@120350eb{/SQL,null,AVAILABLE,@Spark}
2022-01-04 23:49:26 INFO  ContextHandler:781 - Started o.s.j.s.ServletContextHandler@2ccc9681{/SQL/json,null,AVAILABLE,@Spark}
2022-01-04 23:49:26 INFO  ContextHandler:781 - Started o.s.j.s.ServletContextHandler@aa752bb{/SQL/execution,null,AVAILABLE,@Spark}
2022-01-04 23:49:26 INFO  ContextHandler:781 - Started o.s.j.s.ServletContextHandler@77fc19cf{/SQL/execution/json,null,AVAILABLE,@Spark}
2022-01-04 23:49:26 INFO  ContextHandler:781 - Started o.s.j.s.ServletContextHandler@2e45a357{/static/sql,null,AVAILABLE,@Spark}
2022-01-04 23:49:26 INFO  HiveUtils:54 - Initializing HiveMetastoreConnection version 1.2.1 using Spark classes.
2022-01-04 23:49:26 INFO  HiveClientImpl:54 - Warehouse location for Hive client (version 1.2.2) is file:/opt/modules/spark-2.3.2-bin-hadoop2.7/sbin/spark-warehouse
2022-01-04 23:49:26 INFO  metastore:291 - Mestastore configuration hive.metastore.warehouse.dir changed from /user/hive/warehouse to file:/opt/modules/spark-2.3.2-bin-hadoop2.7/sbin/spark-warehouse
2022-01-04 23:49:26 INFO  HiveMetaStore:746 - 0: Shutting down the object store...
2022-01-04 23:49:26 INFO  audit:371 - ugi=hadoop        ip=unknown-ip-addr      cmd=Shutting down the object store...
2022-01-04 23:49:26 INFO  HiveMetaStore:746 - 0: Metastore shutdown complete.
2022-01-04 23:49:26 INFO  audit:371 - ugi=hadoop        ip=unknown-ip-addr      cmd=Metastore shutdown complete.
2022-01-04 23:49:26 INFO  HiveMetaStore:746 - 0: get_database: default
2022-01-04 23:49:26 INFO  audit:371 - ugi=hadoop        ip=unknown-ip-addr      cmd=get_database: default
2022-01-04 23:49:26 INFO  HiveMetaStore:589 - 0: Opening raw store with implemenation class:org.apache.hadoop.hive.metastore.ObjectStore
2022-01-04 23:49:26 INFO  ObjectStore:289 - ObjectStore, initialize called
2022-01-04 23:49:26 INFO  Query:77 - Reading in results for query "org.datanucleus.store.rdbms.query.SQLQuery@0" since the connection used is closing
2022-01-04 23:49:26 INFO  MetaStoreDirectSql:139 - Using direct SQL, underlying DB is DERBY
2022-01-04 23:49:26 INFO  ObjectStore:272 - Initialized ObjectStore
2022-01-04 23:49:28 INFO  StateStoreCoordinatorRef:54 - Registered StateStoreCoordinator endpoint
2022-01-04 23:49:28 INFO  HiveMetaStore:746 - 0: get_database: global_temp
2022-01-04 23:49:28 INFO  audit:371 - ugi=hadoop        ip=unknown-ip-addr      cmd=get_database: global_temp
2022-01-04 23:49:28 WARN  ObjectStore:568 - Failed to get database global_temp, returning NoSuchObjectException
2022-01-04 23:49:32 INFO  HiveMetaStore:746 - 0: get_databases: *
2022-01-04 23:49:32 INFO  audit:371 - ugi=hadoop        ip=unknown-ip-addr      cmd=get_databases: *
2022-01-04 23:49:33 INFO  CodeGenerator:54 - Code generated in 524.895015 ms
default
Time taken: 5.645 seconds, Fetched 1 row(s)
2022-01-04 23:49:33 INFO  SparkSQLCLIDriver:951 - Time taken: 5.645 seconds, Fetched 1 row(s)
2022-01-04 23:49:33 INFO  AbstractConnector:318 - Stopped Spark@7d0cd23c{HTTP/1.1,[http/1.1]}{0.0.0.0:4040}
2022-01-04 23:49:33 INFO  SparkUI:54 - Stopped Spark web UI at http://bigdata-senior01.chybinmy.com:4040
2022-01-04 23:49:33 INFO  MapOutputTrackerMasterEndpoint:54 - MapOutputTrackerMasterEndpoint stopped!
2022-01-04 23:49:33 INFO  MemoryStore:54 - MemoryStore cleared
2022-01-04 23:49:33 INFO  BlockManager:54 - BlockManager stopped
2022-01-04 23:49:33 INFO  BlockManagerMaster:54 - BlockManagerMaster stopped
2022-01-04 23:49:33 INFO  OutputCommitCoordinator$OutputCommitCoordinatorEndpoint:54 - OutputCommitCoordinator stopped!
2022-01-04 23:49:33 INFO  SparkContext:54 - Successfully stopped SparkContext
2022-01-04 23:49:33 INFO  ShutdownHookManager:54 - Shutdown hook called
2022-01-04 23:49:33 INFO  ShutdownHookManager:54 - Deleting directory /tmp/spark-437b36ba-6b7b-4a31-be54-d724731cca35
2022-01-04 23:49:33 INFO  ShutdownHookManager:54 - Deleting directory /tmp/spark-ef9ab382-9d00-4c59-a73f-f565e761bb45
[hadoop@bigdata-senior01 sbin]$
spark-sql -e “show databases”
[hadoop@dss sbin]$ spark-sql -e "show databases"
2022-03-03 06:29:44 WARN  Utils:66 - Your hostname, dss resolves to a loopback address: 127.0.0.1; using 192.168.122.67 instead (on interface eth0)
2022-03-03 06:29:44 WARN  Utils:66 - Set SPARK_LOCAL_IP if you need to bind to another address
2022-03-03 06:29:45 WARN  NativeCodeLoader:62 - Unable to load native-hadoop library for your platform... using builtin-java classes where applicable
2022-03-03 06:29:46 INFO  HiveMetaStore:589 - 0: Opening raw store with implemenation class:org.apache.hadoop.hive.metastore.ObjectStore
2022-03-03 06:29:46 INFO  ObjectStore:289 - ObjectStore, initialize called
2022-03-03 06:29:46 INFO  Persistence:77 - Property hive.metastore.integral.jdo.pushdown unknown - will be ignored
2022-03-03 06:29:46 INFO  Persistence:77 - Property datanucleus.cache.level2 unknown - will be ignored
2022-03-03 06:29:55 INFO  ObjectStore:370 - Setting MetaStore object pin classes with hive.metastore.cache.pinobjtypes="Table,StorageDescriptor,SerDeInfo,Partition,Database,Type,FieldSchema,Order"
2022-03-03 06:29:57 INFO  Datastore:77 - The class "org.apache.hadoop.hive.metastore.model.MFieldSchema" is tagged as "embedded-only" so does not have its own datastore table.
2022-03-03 06:29:57 INFO  Datastore:77 - The class "org.apache.hadoop.hive.metastore.model.MOrder" is tagged as "embedded-only" so does not have its own datastore table.
2022-03-03 06:30:03 INFO  Datastore:77 - The class "org.apache.hadoop.hive.metastore.model.MFieldSchema" is tagged as "embedded-only" so does not have its own datastore table.
2022-03-03 06:30:03 INFO  Datastore:77 - The class "org.apache.hadoop.hive.metastore.model.MOrder" is tagged as "embedded-only" so does not have its own datastore table.
2022-03-03 06:30:05 INFO  MetaStoreDirectSql:139 - Using direct SQL, underlying DB is DERBY
2022-03-03 06:30:05 INFO  ObjectStore:272 - Initialized ObjectStore
2022-03-03 06:30:06 WARN  ObjectStore:6666 - Version information not found in metastore. hive.metastore.schema.verification is not enabled so recording the schema version 1.2.0
2022-03-03 06:30:06 WARN  ObjectStore:568 - Failed to get database default, returning NoSuchObjectException
2022-03-03 06:30:07 INFO  HiveMetaStore:663 - Added admin role in metastore
2022-03-03 06:30:07 INFO  HiveMetaStore:672 - Added public role in metastore
2022-03-03 06:30:07 INFO  HiveMetaStore:712 - No user is added in admin role, since config is empty
2022-03-03 06:30:07 INFO  HiveMetaStore:746 - 0: get_all_databases
2022-03-03 06:30:07 INFO  audit:371 - ugi=hadoop        ip=unknown-ip-addr      cmd=get_all_databases
2022-03-03 06:30:07 INFO  HiveMetaStore:746 - 0: get_functions: db=default pat=*
2022-03-03 06:30:07 INFO  audit:371 - ugi=hadoop        ip=unknown-ip-addr      cmd=get_functions: db=default pat=*
2022-03-03 06:30:07 INFO  Datastore:77 - The class "org.apache.hadoop.hive.metastore.model.MResourceUri" is tagged as "embedded-only" so does not have its own datastore table.
2022-03-03 06:30:08 INFO  SessionState:641 - Created HDFS directory: /tmp/hive/hadoop
2022-03-03 06:30:08 INFO  SessionState:641 - Created local directory: /tmp/d26dff0e-0e55-4623-af6a-a189a8d13689_resources
2022-03-03 06:30:08 INFO  SessionState:641 - Created HDFS directory: /tmp/hive/hadoop/d26dff0e-0e55-4623-af6a-a189a8d13689
2022-03-03 06:30:08 INFO  SessionState:641 - Created local directory: /tmp/hadoop/d26dff0e-0e55-4623-af6a-a189a8d13689
2022-03-03 06:30:08 INFO  SessionState:641 - Created HDFS directory: /tmp/hive/hadoop/d26dff0e-0e55-4623-af6a-a189a8d13689/_tmp_space.db
2022-03-03 06:30:08 INFO  SparkContext:54 - Running Spark version 2.3.2
2022-03-03 06:30:08 INFO  SparkContext:54 - Submitted application: SparkSQL::192.168.122.67
2022-03-03 06:30:09 INFO  SecurityManager:54 - Changing view acls to: hadoop
2022-03-03 06:30:09 INFO  SecurityManager:54 - Changing modify acls to: hadoop
2022-03-03 06:30:09 INFO  SecurityManager:54 - Changing view acls groups to:
2022-03-03 06:30:09 INFO  SecurityManager:54 - Changing modify acls groups to:
2022-03-03 06:30:09 INFO  SecurityManager:54 - SecurityManager: authentication disabled; ui acls disabled; users  with view permissions: Set(hadoop); groups with view permissions: Set(); users  with modify permissions: Set(hadoop); groups with modify permissions: Set()
2022-03-03 06:30:09 INFO  Utils:54 - Successfully started service 'sparkDriver' on port 37582.
2022-03-03 06:30:09 INFO  SparkEnv:54 - Registering MapOutputTracker
2022-03-03 06:30:09 INFO  SparkEnv:54 - Registering BlockManagerMaster
2022-03-03 06:30:09 INFO  BlockManagerMasterEndpoint:54 - Using org.apache.spark.storage.DefaultTopologyMapper for getting topology information
2022-03-03 06:30:09 INFO  BlockManagerMasterEndpoint:54 - BlockManagerMasterEndpoint up
2022-03-03 06:30:09 INFO  DiskBlockManager:54 - Created local directory at /tmp/blockmgr-56268e6d-f9da-4ba0-813d-8a9f0396a3ed
2022-03-03 06:30:09 INFO  MemoryStore:54 - MemoryStore started with capacity 366.3 MB
2022-03-03 06:30:09 INFO  SparkEnv:54 - Registering OutputCommitCoordinator
2022-03-03 06:30:09 INFO  log:192 - Logging initialized @26333ms
2022-03-03 06:30:09 INFO  Server:351 - jetty-9.3.z-SNAPSHOT, build timestamp: unknown, git hash: unknown
2022-03-03 06:30:09 INFO  Server:419 - Started @26464ms
2022-03-03 06:30:09 INFO  AbstractConnector:278 - Started ServerConnector@231cdda8{HTTP/1.1,[http/1.1]}{0.0.0.0:4040}
2022-03-03 06:30:09 INFO  Utils:54 - Successfully started service 'SparkUI' on port 4040.
2022-03-03 06:30:09 INFO  ContextHandler:781 - Started o.s.j.s.ServletContextHandler@544e3679{/jobs,null,AVAILABLE,@Spark}
2022-03-03 06:30:09 INFO  ContextHandler:781 - Started o.s.j.s.ServletContextHandler@3e14d390{/jobs/json,null,AVAILABLE,@Spark}
2022-03-03 06:30:09 INFO  ContextHandler:781 - Started o.s.j.s.ServletContextHandler@5eb87338{/jobs/job,null,AVAILABLE,@Spark}
2022-03-03 06:30:09 INFO  ContextHandler:781 - Started o.s.j.s.ServletContextHandler@31ab1e67{/jobs/job/json,null,AVAILABLE,@Spark}
2022-03-03 06:30:09 INFO  ContextHandler:781 - Started o.s.j.s.ServletContextHandler@29bbc391{/stages,null,AVAILABLE,@Spark}
2022-03-03 06:30:09 INFO  ContextHandler:781 - Started o.s.j.s.ServletContextHandler@3487442d{/stages/json,null,AVAILABLE,@Spark}
2022-03-03 06:30:09 INFO  ContextHandler:781 - Started o.s.j.s.ServletContextHandler@530ee28b{/stages/stage,null,AVAILABLE,@Spark}
2022-03-03 06:30:09 INFO  ContextHandler:781 - Started o.s.j.s.ServletContextHandler@43c7fe8a{/stages/stage/json,null,AVAILABLE,@Spark}
2022-03-03 06:30:09 INFO  ContextHandler:781 - Started o.s.j.s.ServletContextHandler@67f946c3{/stages/pool,null,AVAILABLE,@Spark}
2022-03-03 06:30:09 INFO  ContextHandler:781 - Started o.s.j.s.ServletContextHandler@21b51e59{/stages/pool/json,null,AVAILABLE,@Spark}
2022-03-03 06:30:09 INFO  ContextHandler:781 - Started o.s.j.s.ServletContextHandler@1785d194{/storage,null,AVAILABLE,@Spark}
2022-03-03 06:30:09 INFO  ContextHandler:781 - Started o.s.j.s.ServletContextHandler@6b4a4e40{/storage/json,null,AVAILABLE,@Spark}
2022-03-03 06:30:09 INFO  ContextHandler:781 - Started o.s.j.s.ServletContextHandler@46a8c2b4{/storage/rdd,null,AVAILABLE,@Spark}
2022-03-03 06:30:09 INFO  ContextHandler:781 - Started o.s.j.s.ServletContextHandler@4f664bee{/storage/rdd/json,null,AVAILABLE,@Spark}
2022-03-03 06:30:09 INFO  ContextHandler:781 - Started o.s.j.s.ServletContextHandler@76563ae7{/environment,null,AVAILABLE,@Spark}
2022-03-03 06:30:09 INFO  ContextHandler:781 - Started o.s.j.s.ServletContextHandler@4fd74223{/environment/json,null,AVAILABLE,@Spark}
2022-03-03 06:30:09 INFO  ContextHandler:781 - Started o.s.j.s.ServletContextHandler@4fea840f{/executors,null,AVAILABLE,@Spark}
2022-03-03 06:30:09 INFO  ContextHandler:781 - Started o.s.j.s.ServletContextHandler@32ae8f27{/executors/json,null,AVAILABLE,@Spark}
2022-03-03 06:30:09 INFO  ContextHandler:781 - Started o.s.j.s.ServletContextHandler@75e80a97{/executors/threadDump,null,AVAILABLE,@Spark}
2022-03-03 06:30:09 INFO  ContextHandler:781 - Started o.s.j.s.ServletContextHandler@5b8853{/executors/threadDump/json,null,AVAILABLE,@Spark}
2022-03-03 06:30:09 INFO  ContextHandler:781 - Started o.s.j.s.ServletContextHandler@1b8aaeab{/static,null,AVAILABLE,@Spark}
2022-03-03 06:30:09 INFO  ContextHandler:781 - Started o.s.j.s.ServletContextHandler@5bfc79cb{/,null,AVAILABLE,@Spark}
2022-03-03 06:30:10 INFO  ContextHandler:781 - Started o.s.j.s.ServletContextHandler@27ec8754{/api,null,AVAILABLE,@Spark}
2022-03-03 06:30:10 INFO  ContextHandler:781 - Started o.s.j.s.ServletContextHandler@62f9c790{/jobs/job/kill,null,AVAILABLE,@Spark}
2022-03-03 06:30:10 INFO  ContextHandler:781 - Started o.s.j.s.ServletContextHandler@21e5f0b6{/stages/stage/kill,null,AVAILABLE,@Spark}
2022-03-03 06:30:10 INFO  SparkUI:54 - Bound SparkUI to 0.0.0.0, and started at http://192.168.122.67:4040
2022-03-03 06:30:10 INFO  Executor:54 - Starting executor ID driver on host localhost
2022-03-03 06:30:10 INFO  Utils:54 - Successfully started service 'org.apache.spark.network.netty.NettyBlockTransferService' on port 49364.
2022-03-03 06:30:10 INFO  NettyBlockTransferService:54 - Server created on 192.168.122.67:49364
2022-03-03 06:30:10 INFO  BlockManager:54 - Using org.apache.spark.storage.RandomBlockReplicationPolicy for block replication policy
2022-03-03 06:30:10 INFO  BlockManagerMaster:54 - Registering BlockManager BlockManagerId(driver, 192.168.122.67, 49364, None)
2022-03-03 06:30:10 INFO  BlockManagerMasterEndpoint:54 - Registering block manager 192.168.122.67:49364 with 366.3 MB RAM, BlockManagerId(driver, 192.168.122.67, 49364, None)
2022-03-03 06:30:10 INFO  BlockManagerMaster:54 - Registered BlockManager BlockManagerId(driver, 192.168.122.67, 49364, None)
2022-03-03 06:30:10 INFO  BlockManager:54 - Initialized BlockManager: BlockManagerId(driver, 192.168.122.67, 49364, None)
2022-03-03 06:30:10 INFO  ContextHandler:781 - Started o.s.j.s.ServletContextHandler@537b3b2e{/metrics/json,null,AVAILABLE,@Spark}
2022-03-03 06:30:10 INFO  SharedState:54 - Setting hive.metastore.warehouse.dir ('null') to the value of spark.sql.warehouse.dir ('file:/opt/modules/spark-2.3.2-bin-hadoop2.7/sbin/spark-warehouse').
2022-03-03 06:30:10 INFO  SharedState:54 - Warehouse path is 'file:/opt/modules/spark-2.3.2-bin-hadoop2.7/sbin/spark-warehouse'.
2022-03-03 06:30:10 INFO  ContextHandler:781 - Started o.s.j.s.ServletContextHandler@27bc1d44{/SQL,null,AVAILABLE,@Spark}
2022-03-03 06:30:10 INFO  ContextHandler:781 - Started o.s.j.s.ServletContextHandler@1af677f8{/SQL/json,null,AVAILABLE,@Spark}
2022-03-03 06:30:10 INFO  ContextHandler:781 - Started o.s.j.s.ServletContextHandler@34cd65ac{/SQL/execution,null,AVAILABLE,@Spark}
2022-03-03 06:30:10 INFO  ContextHandler:781 - Started o.s.j.s.ServletContextHandler@61911947{/SQL/execution/json,null,AVAILABLE,@Spark}
2022-03-03 06:30:10 INFO  ContextHandler:781 - Started o.s.j.s.ServletContextHandler@5940b14e{/static/sql,null,AVAILABLE,@Spark}
2022-03-03 06:30:10 INFO  HiveUtils:54 - Initializing HiveMetastoreConnection version 1.2.1 using Spark classes.
2022-03-03 06:30:10 INFO  HiveClientImpl:54 - Warehouse location for Hive client (version 1.2.2) is file:/opt/modules/spark-2.3.2-bin-hadoop2.7/sbin/spark-warehouse
2022-03-03 06:30:10 INFO  metastore:291 - Mestastore configuration hive.metastore.warehouse.dir changed from /user/hive/warehouse to file:/opt/modules/spark-2.3.2-bin-hadoop2.7/sbin/spark-warehouse
2022-03-03 06:30:10 INFO  HiveMetaStore:746 - 0: Shutting down the object store...
2022-03-03 06:30:10 INFO  audit:371 - ugi=hadoop        ip=unknown-ip-addr      cmd=Shutting down the object store...
2022-03-03 06:30:10 INFO  HiveMetaStore:746 - 0: Metastore shutdown complete.
2022-03-03 06:30:10 INFO  audit:371 - ugi=hadoop        ip=unknown-ip-addr      cmd=Metastore shutdown complete.
2022-03-03 06:30:10 INFO  HiveMetaStore:746 - 0: get_database: default
2022-03-03 06:30:10 INFO  audit:371 - ugi=hadoop        ip=unknown-ip-addr      cmd=get_database: default
2022-03-03 06:30:10 INFO  HiveMetaStore:589 - 0: Opening raw store with implemenation class:org.apache.hadoop.hive.metastore.ObjectStore
2022-03-03 06:30:10 INFO  ObjectStore:289 - ObjectStore, initialize called
2022-03-03 06:30:10 INFO  Query:77 - Reading in results for query "org.datanucleus.store.rdbms.query.SQLQuery@0" since the connection used is closing
2022-03-03 06:30:10 INFO  MetaStoreDirectSql:139 - Using direct SQL, underlying DB is DERBY
2022-03-03 06:30:10 INFO  ObjectStore:272 - Initialized ObjectStore
2022-03-03 06:30:11 INFO  StateStoreCoordinatorRef:54 - Registered StateStoreCoordinator endpoint
2022-03-03 06:30:11 INFO  HiveMetaStore:746 - 0: get_database: global_temp
2022-03-03 06:30:11 INFO  audit:371 - ugi=hadoop        ip=unknown-ip-addr      cmd=get_database: global_temp
2022-03-03 06:30:11 WARN  ObjectStore:568 - Failed to get database global_temp, returning NoSuchObjectException
2022-03-03 06:30:14 INFO  HiveMetaStore:746 - 0: get_databases: *
2022-03-03 06:30:14 INFO  audit:371 - ugi=hadoop        ip=unknown-ip-addr      cmd=get_databases: *
2022-03-03 06:30:14 INFO  CodeGenerator:54 - Code generated in 271.767143 ms
default
Time taken: 2.991 seconds, Fetched 1 row(s)
2022-03-03 06:30:14 INFO  SparkSQLCLIDriver:951 - Time taken: 2.991 seconds, Fetched 1 row(s)
2022-03-03 06:30:14 INFO  AbstractConnector:318 - Stopped Spark@231cdda8{HTTP/1.1,[http/1.1]}{0.0.0.0:4040}
2022-03-03 06:30:14 INFO  SparkUI:54 - Stopped Spark web UI at http://192.168.122.67:4040
2022-03-03 06:30:14 INFO  MapOutputTrackerMasterEndpoint:54 - MapOutputTrackerMasterEndpoint stopped!
2022-03-03 06:30:14 INFO  MemoryStore:54 - MemoryStore cleared
2022-03-03 06:30:14 INFO  BlockManager:54 - BlockManager stopped
2022-03-03 06:30:14 INFO  BlockManagerMaster:54 - BlockManagerMaster stopped
2022-03-03 06:30:14 INFO  OutputCommitCoordinator$OutputCommitCoordinatorEndpoint:54 - OutputCommitCoordinator stopped!
2022-03-03 06:30:14 INFO  SparkContext:54 - Successfully stopped SparkContext
2022-03-03 06:30:14 INFO  ShutdownHookManager:54 - Shutdown hook called
2022-03-03 06:30:14 INFO  ShutdownHookManager:54 - Deleting directory /tmp/spark-f46e0008-5a10-405d-8a2a-c5406427ef4d
2022-03-03 06:30:14 INFO  ShutdownHookManager:54 - Deleting directory /tmp/spark-5d80c67d-8631-4340-ad2d-e112802b93a2
[hadoop@dss sbin]$
第十二部分、DSS一键安装
补充nginx配置,测试yum是否好用,准备配置文件
links默认使用python,建议安装python2
web的install.sh中,需要本地安装后,然后去掉nginx的安装,及防火墙的处理部分脚本
修改全家中中conf的config.sh中的nginx端口为非8088 ,不能与yarn冲突
一、使用前环境准备
a. 基础软件安装
Linkix需要的命令工具(在正式安装前,脚本会自动检测这些命令是否可用,如果不存在会尝试自动安装,安装失败则需用户手动安装以下基础shell命令工具):
- telnet tar sed dos2unix mysql yum unzip expect
- MySQL (5.5+)
- JDK (1.8.0_141以上)
- Python(2.7)
- Nginx
- Hadoop(2.7.2,Hadoop其他版本需自行编译Linkis) ,安装的机器必须支持执行
hdfs dfs -ls /命令 - Hive(2.3.3,Hive其他版本需自行编译Linkis),安装的机器必须支持执行
hive -e "show databases"命令 - Spark(支持2.0以上所有版本) ,安装的机器必须支持执行
spark-sql -e "show databases"命令
Tips:
如您是第一次安装Hadoop,单机部署Hadoop可参考:Hadoop单机部署 ;分布式部署Hadoop可参考:Hadoop分布式部署。
如您是第一次安装Hive,可参考:Hive快速安装部署。
如您是第一次安装Spark,On Yarn模式可参考:Spark on Yarn部署。
b. 创建用户
例如: 部署用户是hadoop账号(可以不是hadoop用户,但是推荐使用Hadoop的超级用户进行部署,这里只是一个示例)
- 在所有需要部署的机器上创建部署用户,用于安装
sudo useradd hadoop
- 因为Linkis的服务是以 sudo -u ${linux-user} 方式来切换引擎,从而执行作业,所以部署用户需要有 sudo 权限,而且是免密的。
vim /etc/sudoers
hadoop  ALL=(ALL)       NOPASSWD: NOPASSWD: ALL
- 确保部署 DSS 和 Linkis 的服务器可正常执行 hdfs 、hive -e 和 spark-sql -e 等命令。在一键安装脚本中,会对组件进行检查。
- 如果您的Pyspark想拥有画图功能,则还需在所有安装节点,安装画图模块。命令如下:
下载pip(适用于python3)
 curl https://bootstrap.pypa.io/get-pip.py -o get-pip.py

 下载pip(适用于python2)
 curl https://bootstrap.pypa.io/pip/2.7/get-pip.py -o get-pip.py
 安装pip
 python get-pip.py
 升级pip
 pip install --upgrade pip
 安装matplotlib
 python -m pip install -i https://pypi.tuna.tsinghua.edu.cn/simple matplotlib
 pip install matplotlib
c.安装准备
自行编译或者去组件release页面下载安装包:
- 下载安装包
- wedatasphere-linkis-x.x.x-dist.tar.gz
- wedatasphere-dss-x.x.x-dist.tar.gz
- wedatasphere-dss-web-x.x.x-dist.zip
- 下载 DSS & LINKIS 一键安装部署包,并解压。以下是一键安装部署包的层级目录结构:
├── dss_linkis # 一键部署主目录
 ├── bin # 用于一键安装,以及一键启动 DSS + Linkis
 ├── conf # 一键部署的参数配置目录
 ├── wedatasphere-dss-x.x.x-dist.tar.gz # DSS后台安装包
 ├── wedatasphere-dss-web-x.x.x-dist.zip # DSS前端安装包
 ├── wedatasphere-linkis-x.x.x-dist.tar.gz # Linkis安装包
d. 修改配置
打开conf/config.sh,按需修改相关配置参数:
vim conf/config.sh
参数说明如下:
说明,DSS_WEB_PORT端口需要保证不能 与YARN REST URL端口冲突,可以改为8099或其他可用端口
#################### 一键安装部署的基本配置 ####################

# 部署用户,默认为当前登录用户,非必须不建议修改
# deployUser=hadoop

# 非必须不建议修改
# LINKIS_VERSION=1.0.2

### DSS Web,本机安装无需修改
#DSS_NGINX_IP=127.0.0.1
#DSS_WEB_PORT=8099

# 非必须不建议修改
#DSS_VERSION=1.0.0

## Java应用的堆栈大小。如果部署机器的内存少于8G,推荐128M;达到16G时,推荐至少256M;如果想拥有非常良好的用户使用体验,推荐部署机器的内存至少达到32G。
export SERVER_HEAP_SIZE="128M"

############################################################
##################### Linkis 的配置开始 #####################
########### 非注释的参数必须配置,注释掉的参数可按需修改 ##########
############################################################

### DSS工作空间目录
WORKSPACE_USER_ROOT_PATH=file:///tmp/linkis/
### 用户 HDFS 根路径
HDFS_USER_ROOT_PATH=hdfs:///tmp/linkis
### 结果集路径: file 或者 hdfs path
RESULT_SET_ROOT_PATH=hdfs:///tmp/linkis

### Path to store started engines and engine logs, must be local
ENGINECONN_ROOT_PATH=/appcom/tmp

#ENTRANCE_CONFIG_LOG_PATH=hdfs:///tmp/linkis/

### ==HADOOP配置文件路径,必须配置==
HADOOP_CONF_DIR=/appcom/config/hadoop-config
### HIVE CONF DIR
HIVE_CONF_DIR=/appcom/config/hive-config
### SPARK CONF DIR
SPARK_CONF_DIR=/appcom/config/spark-config

# for install
#LINKIS_PUBLIC_MODULE=lib/linkis-commons/public-module


## YARN REST URL
YARN_RESTFUL_URL=http://127.0.0.1:8088

## Engine版本配置,不配置则采用默认配置
#SPARK_VERSION
#SPARK_VERSION=2.4.3
##HIVE_VERSION
#HIVE_VERSION=1.2.1
#PYTHON_VERSION=python2

## LDAP is for enterprise authorization, if you just want to have a try, ignore it.
#LDAP_URL=ldap://localhost:1389/
#LDAP_BASEDN=dc=webank,dc=com
#LDAP_USER_NAME_FORMAT=cn=%[email protected],OU=xxx,DC=xxx,DC=com

# Microservices Service Registration Discovery Center
#LINKIS_EUREKA_INSTALL_IP=127.0.0.1
#LINKIS_EUREKA_PORT=20303
#LINKIS_EUREKA_PREFER_IP=true

###  Gateway install information
#LINKIS_GATEWAY_PORT =127.0.0.1
#LINKIS_GATEWAY_PORT=9001

### ApplicationManager
#LINKIS_MANAGER_INSTALL_IP=127.0.0.1
#LINKIS_MANAGER_PORT=9101

### EngineManager
#LINKIS_ENGINECONNMANAGER_INSTALL_IP=127.0.0.1
#LINKIS_ENGINECONNMANAGER_PORT=9102

### EnginePluginServer
#LINKIS_ENGINECONN_PLUGIN_SERVER_INSTALL_IP=127.0.0.1
#LINKIS_ENGINECONN_PLUGIN_SERVER_PORT=9103

### LinkisEntrance
#LINKIS_ENTRANCE_INSTALL_IP=127.0.0.1
#LINKIS_ENTRANCE_PORT=9104

###  publicservice
#LINKIS_PUBLICSERVICE_INSTALL_IP=127.0.0.1
#LINKIS_PUBLICSERVICE_PORT=9105

### cs
#LINKIS_CS_INSTALL_IP=127.0.0.1
#LINKIS_CS_PORT=9108

##################### Linkis 的配置完毕 #####################

############################################################
####################### DSS 的配置开始 #######################
########### 非注释的参数必须配置,注释掉的参数可按需修改 ##########
############################################################

# 用于存储发布到 Schedulis 的临时ZIP包文件
WDS_SCHEDULER_PATH=file:///appcom/tmp/wds/scheduler

### This service is used to provide dss-framework-project-server capability.
#DSS_FRAMEWORK_PROJECT_SERVER_INSTALL_IP=127.0.0.1
#DSS_FRAMEWORK_PROJECT_SERVER_PORT=9002

### This service is used to provide dss-framework-orchestrator-server capability.
#DSS_FRAMEWORK_ORCHESTRATOR_SERVER_INSTALL_IP=127.0.0.1
#DSS_FRAMEWORK_ORCHESTRATOR_SERVER_PORT=9003

### This service is used to provide dss-apiservice-server capability.
#DSS_APISERVICE_SERVER_INSTALL_IP=127.0.0.1
#DSS_APISERVICE_SERVER_PORT=9004

### This service is used to provide dss-workflow-server capability.
#DSS_WORKFLOW_SERVER_INSTALL_IP=127.0.0.1
#DSS_WORKFLOW_SERVER_PORT=9005

### dss-flow-Execution-Entrance
### This service is used to provide flow execution capability.
#DSS_FLOW_EXECUTION_SERVER_INSTALL_IP=127.0.0.1
#DSS_FLOW_EXECUTION_SERVER_PORT=9006

### This service is used to provide dss-datapipe-server capability.
#DSS_DATAPIPE_SERVER_INSTALL_IP=127.0.0.1
#DSS_DATAPIPE_SERVER_PORT=9008

##sendemail配置,只影响DSS工作流中发邮件功能
EMAIL_HOST=smtp.163.com
EMAIL_PORT=25
[email protected]
EMAIL_PASSWORD=xxxxx
EMAIL_PROTOCOL=smtp
####################### DSS 的配置结束 #######################
如下地址需要配置
###HADOOP CONF DIR #/appcom/config/hadoop-config
HADOOP_CONF_DIR=/opt/modules/hadoop-2.7.2/etc/hadoop/
###HIVE CONF DIR #/appcom/config/hive-config
HIVE_CONF_DIR=/opt/modules/apache-hive-2.3.3/conf
###SPARK CONF DIR #/appcom/config/spark-config
SPARK_CONF_DIR=/opt/modules/spark-2.3.2-bin-hadoop2.7/conf
e. 修改数据库配置
请确保配置的数据库,安装机器可以正常访问,否则将会出现DDL和DML导入失败的错误。
vi conf/db.sh
### 配置DSS数据库
MYSQL_HOST=127.0.0.1
MYSQL_PORT=3306
MYSQL_DB=dss
MYSQL_USER=root
MYSQL_PASSWORD=asdf1234

## Hive metastore的数据库配置,用于Linkis访问Hive的元数据信息
HIVE_HOST=127.0.0.1
HIVE_PORT=3306
HIVE_DB=hive
HIVE_USER=root
HIVE_PASSWORD=asdf1234
f. 修改wedatasphere-dss-web-1.0.1-dist配置
install.sh中的如下部分需要处理
centos7(){
    # nginx是否安装
    #sudo rpm -Uvh http://nginx.org/packages/centos/7/noarch/RPMS/nginx-release-centos-7-0.el7.ngx.noarch.rpm
    #调整点:1
    # yum安装的部分nginx,缺少“/etc/nginx/conf.d/文件夹”,所以nginx手动安装,详见第8部分
    #sudo yum install -y nginx
    #echo "Nginx installed successfully"

    # 配置nginx
    dssConf

    # 解决 0.0.0.0:8888 问题
    yum -y install policycoreutils-python
    semanage port -a -t http_port_t -p tcp $dss_port

    # 开放前端访问端口
    #调整点2
    #【如果用于测试,本地已关闭防火墙,不需要执行】
    #firewall-cmd --zone=public --add-port=$dss_port/tcp --permanent

    #调整点3
    #重启防火墙
    # 【如果用于测试,本地已关闭防火墙,不需要执行】
    #firewall-cmd --reload

    # 启动nginx
    systemctl restart nginx

    # 调整SELinux的参数
    sed -i "s/SELINUX=enforcing/SELINUX=disabled/g" /etc/selinux/config
    # 临时生效
    setenforce 0

}
二、安装和使用
1. 执行安装脚本:
sh bin/install.sh
# 看具体执行到哪一步
sh -v bin/install.sh
2. 安装步骤
-
该安装脚本会检查各项集成环境命令,如果没有请按照提示进行安装,以下命令为必须项【环境准备时已经安装】
yum java mysql zip unzip expect telnet tar sed dos2unix nginx
-
安装时,脚本会询问您是否需要初始化数据库并导入元数据,Linkis 和 DSS 均会询问。
第一次安装必须选是。
3. 是否安装成功:
通过查看控制台打印的日志信息查看是否安装成功。
如果有错误信息,可以查看具体报错原因。
4. 启动服务
(1) 启动服务:
在安装目录执行以下命令,启动所有服务:
sh bin/start-all.sh
如果启动产生了错误信息,可以查看具体报错原因。启动后,各项微服务都会进行通信检测,如果有异常则可以帮助用户定位异常日志和原因。
(2) 查看是否启动成功
可以在Eureka界面查看 Linkis & DSS 后台各微服务的启动情况。 [外链图片转存失败,源站可能有防盗链机制,建议将图片保存下来直接上传(img-2g42t5Fv-1646916641903)(https://github.com/WeBankFinTech/DataSphereStudio-Doc/raw/main/zh_CN/Images/%E5%AE%89%E8%A3%85%E9%83%A8%E7%BD%B2/DSS%E5%8D%95%E6%9C%BA%E9%83%A8%E7%BD%B2%E6%96%87%E6%A1%A3/eureka.png)]
![[外链图片转存失败,源站可能有防盗链机制,建议将图片保存下来直接上传(img-2g42t5Fv-1646916641903)(https://github.com/WeBankFinTech/DataSphereStudio-Doc/raw/main/zh_CN/Images/%E5%AE%89%E8%A3%85%E9%83%A8%E7%BD%B2/DSS%E5%8D%95%E6%9C%BA%E9%83%A8%E7%BD%B2%E6%96%87%E6%A1%A3/eureka.png)]](https://github.com/WeBankFinTech/DataSphereStudio-Doc/blob/main/zh_CN/Images/%E5%AE%89%E8%A3%85%E9%83%A8%E7%BD%B2/DSS%E5%8D%95%E6%9C%BA%E9%83%A8%E7%BD%B2%E6%96%87%E6%A1%A3/eureka.png)
(3) 谷歌浏览器访问:
请使用谷歌浏览器访问以下前端地址:
http://DSS_NGINX_IP:DSS_WEB_PORT 启动日志会打印此访问地址。登陆时管理员的用户名和密码均为部署用户名,如部署用户为hadoop,则管理员的用户名/密码为:hadoop/hadoop。
(4) 停止服务:
在安装目录执行以下命令,停止所有服务:
sh bin/stop-all.sh
通过如下脚本判断是否停止成功,如果停止失败可以通过kill结束进程
ps -ef|grep DSS
ps -ef|grep Linkis
ps -ef|grep eureka
(5) 安装成功后,有6个DSS服务,8个Linkis服务
LINKIS-CG-ENGINECONNMANAGER
LINKIS-CG-ENGINEPLUGIN
LINKIS-CG-ENTRANCE
LINKIS-CG-LINKISMANAGER
LINKIS-MG-EUREKA
LINKIS-MG-GATEWAY
LINKIS-PS-CS
LINKIS-PS-PUBLICSERVICE
5.安装日志 install.sh
[hadoop@dss dssLinksFamilyMeals]$ sh bin/install.sh


########################################################################################
########################################################################################
Welcome to DSS & Linkis Deployment Service!
Suitable for Linkis and DSS first installation, please be sure the environment is ready.
########################################################################################
########################################################################################

It is recommended to use 5G memory.
Each service is set to 256M, with a minimum of 128M.
The default configuration is 256M.
If you need to modify it, please modify conf/config.sh

Are you sure you have installed the database?
If installed, enter 1, otherwise enter 0

Please input the choice:1

Do you need to check the installation environment?
Enter 1 if necessary, otherwise enter 0

Please input the choice:0


########################################################################
###################### Start to install Linkis #########################
########################################################################
Start to unzip linkis package.
Succeed to + Unzip linkis package to /opt/modules/dssLinksFamilyMeals/linkis-pre-install.
Start to replace linkis field value.
End to replace linkis field value.
<-----start to check used cmd---->
<-----end to check used cmd---->
Succeed to + check env
step1:load config
Succeed to + load config
Do you want to clear Linkis table information in the database?
 1: Do not execute table-building statements
 2: Dangerous! Clear all data and rebuild the tables
 other: exit

Please input the choice:2
You chose Rebuild the table
create hdfs  directory and local directory
Succeed to + create file:///tmp/linkis/ directory
Succeed to + create hdfs:///tmp/linkis directory
Succeed to + create hdfs:///tmp/linkis directory
rm: cannot remove ‘/opt/modules/dssLinksFamilyMeals/linkis-bak’: No such file or directory
mv  /opt/modules/dssLinksFamilyMeals/linkis  /opt/modules/dssLinksFamilyMeals/linkis-bak
create dir LINKIS_HOME: /opt/modules/dssLinksFamilyMeals/linkis
Succeed to + Create the dir of /opt/modules/dssLinksFamilyMeals/linkis
Start to cp /opt/modules/dssLinksFamilyMeals/linkis-pre-install/linkis-package to /opt/modules/dssLinksFamilyMeals/linkis.
Succeed to + cp /opt/modules/dssLinksFamilyMeals/linkis-pre-install/linkis-package to /opt/modules/dssLinksFamilyMeals/linkis
mysql: [Warning] Using a password on the command line interface can be insecure.
mysql: [Warning] Using a password on the command line interface can be insecure.
Succeed to + source linkis_ddl.sql
mysql: [Warning] Using a password on the command line interface can be insecure.
+-----------------+
| @label_id := id |
+-----------------+
|               1 |
+-----------------+
+-----------------+
| @label_id := id |
+-----------------+
|               2 |
+-----------------+
+-----------------+
| @label_id := id |
+-----------------+
|               3 |
+-----------------+
+-----------------+
| @label_id := id |
+-----------------+
|               4 |
+-----------------+
+-----------------+
| @label_id := id |
+-----------------+
|              11 |
+-----------------+
+-----------------+
| @label_id := id |
+-----------------+
|              12 |
+-----------------+
+-----------------+
| @label_id := id |
+-----------------+
|              13 |
+-----------------+
+-----------------+
| @label_id := id |
+-----------------+
|              14 |
+-----------------+
+-----------------+
| @label_id := id |
+-----------------+
|              15 |
+-----------------+
+-----------------+
| @label_id := id |
+-----------------+
|              16 |
+-----------------+
+-----------------+
| @label_id := id |
+-----------------+
|              17 |
+-----------------+
+-----------------+
| @label_id := id |
+-----------------+
|              18 |
+-----------------+
+-----------------+
| @label_id := id |
+-----------------+
|              19 |
+-----------------+
Succeed to + source linkis_dml.sql
Rebuild the table
Update config...
update conf /opt/modules/dssLinksFamilyMeals/linkis/conf/linkis.properties
update conf /opt/modules/dssLinksFamilyMeals/linkis/conf/linkis-mg-gateway.properties
update conf /opt/modules/dssLinksFamilyMeals/linkis/conf/linkis-ps-publicservice.properties
Congratulations! You have installed Linkis 1.0.3 successfully, please use sh /opt/modules/dssLinksFamilyMeals/linkis/sbin/linkis-start-all.sh to start it!
Your default account password ishadoop/a61035488
Succeed to + install Linkis


#########################################################################
###################### Start to install DSS Service #####################
#########################################################################
Succeed to + Create the dir of /opt/modules/dssLinksFamilyMeals/dss-pre-install
Start to unzip dss server package.
Succeed to + Unzip dss server package to /opt/modules/dssLinksFamilyMeals/dss-pre-install
Start to replace dss field value.
End to replace dss field value.
java version "1.8.0_261"
Java(TM) SE Runtime Environment (build 1.8.0_261-b12)
Java HotSpot(TM) 64-Bit Server VM (build 25.261-b12, mixed mode)
Succeed to + execute java --version
step1:load config
Do you want to clear Dss table information in the database?
 1: Do not execute table-building statements
 2: Dangerous! Clear all data and rebuild the tables.

Please input the choice:2
You chose Rebuild the table
Simple installation mode
java version "1.8.0_261"
Java(TM) SE Runtime Environment (build 1.8.0_261-b12)
Java HotSpot(TM) 64-Bit Server VM (build 25.261-b12, mixed mode)
Succeed to + execute java --version
telnet check for your MYSQL, if you wait for a long time,may be your MYSQL does not prepared
MYSQL is OK.
mysql: [Warning] Using a password on the command line interface can be insecure.
Succeed to + source dss_ddl.sql
mysql: [Warning] Using a password on the command line interface can be insecure.
+---------------------------------+
| @dss_appconn_orchestratorId:=id |
+---------------------------------+
|                               2 |
+---------------------------------+
+-----------------------------+
| @dss_appconn_workflowId:=id |
+-----------------------------+
|                           3 |
+-----------------------------+
+---------------------------------+
| @dss_appconn_eventcheckerId:=id |
+---------------------------------+
|                               5 |
+---------------------------------+
+--------------------------------+
| @dss_appconn_datacheckerId:=id |
+--------------------------------+
|                              6 |
+--------------------------------+
Succeed to + source dss_dml_real.sql
Rebuild the table
step2:update config
rm: cannot remove ‘/opt/modules/dssLinksFamilyMeals/dss-bak’: No such file or directory
mv  /opt/modules/dssLinksFamilyMeals/dss  /opt/modules/dssLinksFamilyMeals/dss-bak
create dir SERVER_HOME: /opt/modules/dssLinksFamilyMeals/dss
Succeed to + Create the dir of /opt/modules/dssLinksFamilyMeals/dss
Succeed to + subsitution /opt/modules/dssLinksFamilyMeals/dss/conf/dss-framework-project-server.properties
Succeed to + subsitution /opt/modules/dssLinksFamilyMeals/dss/conf/dss-framework-orchestrator-server.properties
Succeed to + subsitution /opt/modules/dssLinksFamilyMeals/dss/conf/dss-apiservice-server.properties
Succeed to + subsitution /opt/modules/dssLinksFamilyMeals/dss/conf/dss-datapipe-server.properties
Succeed to + subsitution /opt/modules/dssLinksFamilyMeals/dss/conf/dss-flow-execution-server.properties
Succeed to + subsitution /opt/modules/dssLinksFamilyMeals/dss/conf/dss-workflow-server.properties
Congratulations! You have installed DSS 1.0.1 successfully, please use sbin/dss-start-all.sh to start it!
Succeed to + install DSS Service


###########################################################################
###################### Start to install DSS & Linkis Web ##################
###########################################################################
Succeed to + Create the dir of /opt/modules/dssLinksFamilyMeals/web
Start to unzip dss web package.
Succeed to + Unzip dss web package to /opt/modules/dssLinksFamilyMeals/web
Start to replace dss web field value.
End to replace  dss web field value.
dss front-end deployment script
linux
Loaded plugins: fastestmirror
Loading mirror speeds from cached hostfile
 * base: mirrors.bupt.edu.cn
 * epel: mirror.earthlink.iq
 * extras: mirrors.cn99.com
 * updates: mirrors.cn99.com
Package policycoreutils-python-2.5-34.el7.x86_64 already installed and latest version
Nothing to do
ValueError: Port tcp/8088 already defined
Succeed to + install DSS & Linkis Web

Eureka configuration path of Linkis: linkis/conf/application-linkis.yml
Eureka configuration path of DSS : dss/conf/application-dss.yml

Congratulations! You have installed DSS & Linkis successfully, please use bin/start-all.sh to start it!
6.启动脚本 start-all.sh
[hadoop@dss dssLinksFamilyMeals]$
[hadoop@dss dssLinksFamilyMeals]$ bin/start-all.sh
########################################################################
###################### Begin to start Linkis ###########################
########################################################################
We will start all linkis applications, it will take some time, please wait
<-------------------------------->
Begin to start mg-eureka
Is local execution:sh /opt/modules/dssLinksFamilyMeals/linkis/sbin/linkis-daemon.sh restart mg-eureka
server mg-eureka is not running
Start to check whether the mg-eureka is running
Start server, startup script:  /opt/modules/dssLinksFamilyMeals/linkis/sbin/ext/linkis-mg-eureka
nohup: redirecting stderr to stdout
server linkis-mg-eureka start succeeded!
Succeed to + End to start mg-eureka
<-------------------------------->
<-------------------------------->
Begin to start mg-gateway
Is local execution:sh /opt/modules/dssLinksFamilyMeals/linkis/sbin/linkis-daemon.sh restart mg-gateway
server mg-gateway is not running
Start to check whether the mg-gateway is running
Start server, startup script:  /opt/modules/dssLinksFamilyMeals/linkis/sbin/ext/linkis-mg-gateway
nohup: redirecting stderr to stdout
server linkis-mg-gateway start succeeded!
Succeed to + End to start mg-gateway
<-------------------------------->
<-------------------------------->
Begin to start ps-publicservice
Is local execution:sh /opt/modules/dssLinksFamilyMeals/linkis/sbin/linkis-daemon.sh restart ps-publicservice
server ps-publicservice is not running
Start to check whether the ps-publicservice is running
Start server, startup script:  /opt/modules/dssLinksFamilyMeals/linkis/sbin/ext/linkis-ps-publicservice
nohup: redirecting stderr to stdout
server linkis-ps-publicservice start succeeded!
Succeed to + End to start ps-publicservice
<-------------------------------->
<-------------------------------->
Begin to start cg-linkismanager
Is local execution:sh /opt/modules/dssLinksFamilyMeals/linkis/sbin/linkis-daemon.sh restart cg-linkismanager
server cg-linkismanager is not running
Start to check whether the cg-linkismanager is running
Start server, startup script:  /opt/modules/dssLinksFamilyMeals/linkis/sbin/ext/linkis-cg-linkismanager
nohup: redirecting stderr to stdout
server linkis-cg-linkismanager start succeeded!
Succeed to + End to start cg-linkismanager
<-------------------------------->
<-------------------------------->
Begin to start ps-cs
Is local execution:sh /opt/modules/dssLinksFamilyMeals/linkis/sbin/linkis-daemon.sh restart ps-cs
server ps-cs is not running
Start to check whether the ps-cs is running
Start server, startup script:  /opt/modules/dssLinksFamilyMeals/linkis/sbin/ext/linkis-ps-cs
nohup: redirecting stderr to stdout
server linkis-ps-cs start succeeded!
Succeed to + End to start ps-cs
<-------------------------------->
<-------------------------------->
Begin to start cg-entrance
Is local execution:sh /opt/modules/dssLinksFamilyMeals/linkis/sbin/linkis-daemon.sh restart cg-entrance
server cg-entrance is not running
Start to check whether the cg-entrance is running
Start server, startup script:  /opt/modules/dssLinksFamilyMeals/linkis/sbin/ext/linkis-cg-entrance
nohup: redirecting stderr to stdout
server linkis-cg-entrance start succeeded!
Succeed to + End to start cg-entrance
<-------------------------------->
<-------------------------------->
Begin to start cg-engineconnmanager
Is local execution:sh /opt/modules/dssLinksFamilyMeals/linkis/sbin/linkis-daemon.sh restart cg-engineconnmanager
server cg-engineconnmanager is not running
Start to check whether the cg-engineconnmanager is running
Start server, startup script:  /opt/modules/dssLinksFamilyMeals/linkis/sbin/ext/linkis-cg-engineconnmanager
nohup: redirecting stderr to stdout
server linkis-cg-engineconnmanager start succeeded!
Succeed to + End to start cg-engineconnmanager
<-------------------------------->
<-------------------------------->
Begin to start cg-engineplugin
Is local execution:sh /opt/modules/dssLinksFamilyMeals/linkis/sbin/linkis-daemon.sh restart cg-engineplugin
server cg-engineplugin is not running
Start to check whether the cg-engineplugin is running
Start server, startup script:  /opt/modules/dssLinksFamilyMeals/linkis/sbin/ext/linkis-cg-engineplugin
nohup: redirecting stderr to stdout
server linkis-cg-engineplugin start succeeded!
Succeed to + End to start cg-engineplugin
<-------------------------------->
start-all shell script executed completely
Start to check all linkis microservice
<-------------------------------->
Begin to check mg-eureka
Is local execution:sh /opt/modules/dssLinksFamilyMeals/linkis/sbin/linkis-daemon.sh status mg-eureka
12210
server mg-eureka is running.
<-------------------------------->
<-------------------------------->
Begin to check mg-gateway
Is local execution:sh /opt/modules/dssLinksFamilyMeals/linkis/sbin/linkis-daemon.sh status mg-gateway
12248
server mg-gateway is running.
<-------------------------------->
<-------------------------------->
Begin to check ps-publicservice
Is local execution:sh /opt/modules/dssLinksFamilyMeals/linkis/sbin/linkis-daemon.sh status ps-publicservice
12317
server ps-publicservice is running.
<-------------------------------->
<-------------------------------->
Begin to check ps-cs
Is local execution:sh /opt/modules/dssLinksFamilyMeals/linkis/sbin/linkis-daemon.sh status ps-cs
12465
server ps-cs is running.
<-------------------------------->
<-------------------------------->
Begin to check cg-linkismanager
Is local execution:sh /opt/modules/dssLinksFamilyMeals/linkis/sbin/linkis-daemon.sh status cg-linkismanager
12363
server cg-linkismanager is running.
<-------------------------------->
<-------------------------------->
Begin to check cg-entrance
Is local execution:sh /opt/modules/dssLinksFamilyMeals/linkis/sbin/linkis-daemon.sh status cg-entrance
12519
server cg-entrance is running.
<-------------------------------->
<-------------------------------->
Begin to check cg-engineconnmanager
Is local execution:sh /opt/modules/dssLinksFamilyMeals/linkis/sbin/linkis-daemon.sh status cg-engineconnmanager
12575
server cg-engineconnmanager is running.
<-------------------------------->
<-------------------------------->
Begin to check cg-engineplugin
Is local execution:sh /opt/modules/dssLinksFamilyMeals/linkis/sbin/linkis-daemon.sh status cg-engineplugin
12631
server cg-engineplugin is running.
<-------------------------------->
Linkis started successfully
Succeed to + start Linkis


########################################################################
###################### Begin to start DSS Service ######################
########################################################################
We will start all dss applications, it will take some time, please wait
<-------------------------------->
Begin to start dss-framework-project-server
Is local execution:sh /opt/modules/dssLinksFamilyMeals/dss/sbin/dss-daemon.sh restart dss-framework-project-server
server dss-framework-project-server is not running
Start to check whether the dss-framework-project-server is running
Start to start server, startup script:  /opt/modules/dssLinksFamilyMeals/dss/sbin/ext/dss-framework-project-server
nohup: redirecting stderr to stdout
server dss-framework-project-server start succeeded!
End to start dss-framework-project-server
<-------------------------------->
<-------------------------------->
Begin to start dss-framework-orchestrator-server
Is local execution:sh /opt/modules/dssLinksFamilyMeals/dss/sbin/dss-daemon.sh restart dss-framework-orchestrator-server
server dss-framework-orchestrator-server is not running
Start to check whether the dss-framework-orchestrator-server is running
Start to start server, startup script:  /opt/modules/dssLinksFamilyMeals/dss/sbin/ext/dss-framework-orchestrator-server
nohup: redirecting stderr to stdout
server dss-framework-orchestrator-server start succeeded!
End to start dss-framework-orchestrator-server
<-------------------------------->
<-------------------------------->
Begin to start dss-apiservice-server
Is local execution:sh /opt/modules/dssLinksFamilyMeals/dss/sbin/dss-daemon.sh restart dss-apiservice-server
server dss-apiservice-server is not running
Start to check whether the dss-apiservice-server is running
Start to start server, startup script:  /opt/modules/dssLinksFamilyMeals/dss/sbin/ext/dss-apiservice-server
nohup: redirecting stderr to stdout
server dss-apiservice-server start succeeded!
End to start dss-apiservice-server
<-------------------------------->
<-------------------------------->
Begin to start dss-datapipe-server
Is local execution:sh /opt/modules/dssLinksFamilyMeals/dss/sbin/dss-daemon.sh restart dss-datapipe-server
server dss-datapipe-server is not running
Start to check whether the dss-datapipe-server is running
Start to start server, startup script:  /opt/modules/dssLinksFamilyMeals/dss/sbin/ext/dss-datapipe-server
nohup: redirecting stderr to stdout
server dss-datapipe-server start succeeded!
End to start dss-datapipe-server
<-------------------------------->
<-------------------------------->
Begin to start dss-workflow-server
Is local execution:sh /opt/modules/dssLinksFamilyMeals/dss/sbin/dss-daemon.sh restart dss-workflow-server
server dss-workflow-server is not running
Start to check whether the dss-workflow-server is running
Start to start server, startup script:  /opt/modules/dssLinksFamilyMeals/dss/sbin/ext/dss-workflow-server
nohup: redirecting stderr to stdout
server dss-workflow-server start succeeded!
End to start dss-workflow-server
<-------------------------------->
<-------------------------------->
Begin to start dss-flow-execution-server
Is local execution:sh /opt/modules/dssLinksFamilyMeals/dss/sbin/dss-daemon.sh restart dss-flow-execution-server
server dss-flow-execution-server is not running
Start to check whether the dss-flow-execution-server is running
Start to start server, startup script:  /opt/modules/dssLinksFamilyMeals/dss/sbin/ext/dss-flow-execution-server
nohup: redirecting stderr to stdout
server dss-flow-execution-server start succeeded!
End to start dss-flow-execution-server
<-------------------------------->
<-------------------------------->
Begin to check dss-framework-project-server
Is local execution:sh /opt/modules/dssLinksFamilyMeals/dss/sbin/dss-daemon.sh status dss-framework-project-server
server dss-framework-project-server is running.
<-------------------------------->
<-------------------------------->
Begin to check dss-framework-orchestrator-server
Is local execution:sh /opt/modules/dssLinksFamilyMeals/dss/sbin/dss-daemon.sh status dss-framework-orchestrator-server
server dss-framework-orchestrator-server is running.
<-------------------------------->
<-------------------------------->
Begin to check dss-apiservice-server
Is local execution:sh /opt/modules/dssLinksFamilyMeals/dss/sbin/dss-daemon.sh status dss-apiservice-server
server dss-apiservice-server is running.
<-------------------------------->
<-------------------------------->
Begin to check dss-datapipe-server
Is local execution:sh /opt/modules/dssLinksFamilyMeals/dss/sbin/dss-daemon.sh status dss-datapipe-server
server dss-datapipe-server is running.
<-------------------------------->
<-------------------------------->
Begin to check dss-workflow-server
Is local execution:sh /opt/modules/dssLinksFamilyMeals/dss/sbin/dss-daemon.sh status dss-workflow-server
server dss-workflow-server is running.
<-------------------------------->
<-------------------------------->
Begin to check dss-flow-execution-server
Is local execution:sh /opt/modules/dssLinksFamilyMeals/dss/sbin/dss-daemon.sh status dss-flow-execution-server
server dss-flow-execution-server is running.
<-------------------------------->
Succeed to + start DSS Service


########################################################################
###################### Begin to start DSS & Linkis web ##########################
########################################################################
Succeed to + start DSS & Linkis Web

===============================================
There are eight micro services in Linkis:
linkis-cg-engineconnmanager
linkis-cg-engineplugin
linkis-cg-entrance
linkis-cg-linkismanager
linkis-mg-eureka
linkis-mg-gateway
linkis-ps-cs
linkis-ps-publicservice
-----------------------------------------------
There are six micro services in DSS:
dss-framework-project-server
dss-framework-orchestrator-server-dev
dss-workflow-server-dev
dss-flow-entrance
dss-datapipe-server
dss-apiservice-server
===============================================

Log path of Linkis: linkis/logs
Log path of DSS : dss/logs

You can check DSS & Linkis by acessing eureka URL: http://192.168.122.67:20303
You can acess DSS & Linkis Web by http://192.168.122.67:8088

[hadoop@dss dssLinksFamilyMeals]$
7.日志说明
dss路径下(/opt/modules/dssLinksFamilyMeals/dss/logs)
dss-apiservice-server.out
dss-datapipe-server.out
dss-flow-execution-server.out
dss-framework-orchestrator-server.out
dss-framework-project-server.out
dss-workflow-server.out
linkis路径下(/opt/modules/dssLinksFamilyMeals/linkis/logs)
linkis-cg-engineconnmanager.out
linkis-cg-engineplugin.out
linkis-cg-entrance.out
linkis-cg-linkismanager.out
linkis-mg-eureka.out
linkis-mg-gateway.out
linkis-ps-cs.out
linkis-ps-publicservice.out
三、相关访问地址
nginx http://192.168.122.67/
hadoop http://192.168.122.67:50070/dfshealth.html
spark http://192.168.122.67:8080/
spark http://192.168.122.67:8081/
eureka URL: http://192.168.122.67:20303
DSS & Linkis Web by http://192.168.122.67:8088
登录密码可以从日志中查到,参考如下信息
Your default account password is hadoop/5f8a94fae
第十三部分、帮助
一、软连接的创建、删除、修改
1、软链接创建
ln -s 【目标目录】 【软链接地址】
【目标目录】指软连接指向的目标目录下,【软链接地址】指“快捷键”文件名称,该文件是被指令创建的。如下示例,public文件本来在data文件下是不存在的,执行指令后才存在的。
软链接创建需要同级目录下没有同名的文件。就像你在windows系统桌面创建快捷键时,不能有同名的文件。
当同级目录下,有同名的文件存在时,会报错误。
2、删除
rm -rf 【软链接地址】
上述指令中,软链接地址最后不能含有“/”,当含有“/”时,删除的是软链接目标目录下的资源,而不是软链接本身。
3、修改
#ln -snf 【新目标目录】 【软链接地址】
这里修改是指修改软链接的目标目录 。
————————————————
版权声明:本文为CSDN博主「主主主主公」的原创文章,遵循CC 4.0 BY-SA版权协议,转载请附上原文出处链接及本声明。
原文链接:https://blog.csdn.net/xhx94/article/details/98865598
二、sudo指令和/etc/sudoers文件说明
sudo 命令
-l 显示当前用户的sudo权限
-l username 显示username的sudo权限
-u username 以username的权限执行
-k 强迫用户下一次执行sudo时问密码(不论有无超过n分钟)
-b 后台执行
-p 修改提示符,%u,%h
-H 将HOME环境变量设为新身份的HOME环境变量
-s 执行指定的shell
-v 延长密码有效期限5分钟
## Sudoers 允许特定用户在不需要root密码的情况下,运行各种需要root权限的指令
## 相关命令的集合的文件底部提供了示例,然后可以将它们委托给特定的用户或组。
## 该文件必须使用visudo指令编辑
格式:
root ALL=(ALL) ALL
User Aliases Host Aliases = (Runas Aliases) Command Aliases
谁 通过 哪些主机 可以通过 哪个身份 运行 哪些命令
User Aliases和Runas Aliases可取值:
username
#uid
%gropname
%#gid
User_Alias/Runas_Alias
Host Aliases可取值:
hostname
ip
172.16.8.6/16
netgroup
Host_Alias
Command Aliases可取值:
commandname
directory
sudoedit
Cmnd_Alias
## Runas Aliases
# 以什么样的身份运行后面的指令
Runas_Alias USER1 = root
## Host Aliases
## 主机组,您可能更愿意使用主机名(也可使用通配符匹配整个域)或IP地址。
# Host_Alias FILESERVERS = fs1, fs2
# Host_Alias MAILSERVERS = smtp, smtp2
## User Aliases
## 用户,这些通常不是必需的,因为您可以在此文件中使用常规组(即来自文件,LDAP,NIS等) - 只需使用%groupname,而不是USERALIAS
# User_Alias ADMINS = jsmith, mikem
## Command Aliases
## 相关命令的集合
## 网络相关的指令
# Cmnd_Alias NETWORKING = /sbin/route, /sbin/ifconfig, /bin/ping, /sbin/dhclient, /usr/bin/net, /sbin/iptables, /usr/bin/rfcomm, /usr/bin/wvdial, /sbin/iwconfig, /sbin/mii-tool
## 软件安装和管理使用的指令
# Cmnd_Alias SOFTWARE = /bin/rpm, /usr/bin/up2date, /usr/bin/yum
## 服务相关的指令
# Cmnd_Alias SERVICES = /sbin/service, /sbin/chkconfig
## 升级locate数据库的指令
# Cmnd_Alias LOCATE = /usr/bin/updatedb
## 存储相关的指令
# Cmnd_Alias STORAGE = /sbin/fdisk, /sbin/sfdisk, /sbin/parted, /sbin/partprobe, /bin/mount, /bin/umount
## 委派权限相关的指令
# Cmnd_Alias DELEGATING = /usr/sbin/visudo, /bin/chown, /bin/chmod, /bin/chgrp
## 进程相关的指令
# Cmnd_Alias PROCESSES = /bin/nice, /bin/kill, /usr/bin/kill, /usr/bin/killall
## 驱动模块的相关的指令
# Cmnd_Alias DRIVERS = /sbin/modprobe
##开发常用指令
Cmnd_Alias DEVELOP = /usr/bin/cd, /usr/bin/pwd, /usr/bin/mkdir, /usr/bin/rmdir, /usr/bin/basename, /usr/bin/dirname, /usr/bin/vi, /usr/bin/diff, /usr/bin/find, /usr/bin/cat, /usr/bin/ta
c, /usr/bin/rev, /usr/bin/head, /usr/bin/tail, /usr/bin/tailf, /usr/bin/echo, /usr/bin/wc, /usr/bin/chown, /usr/bin/chmod, /usr/bin/chgrp, /usr/bin/gzip, /usr/bin/zcat, /usr/bin/gunzip,/
usr/bin/tar, /usr/sbin/ifconfig, /usr/bin/ping, /usr/bin/telnet, /usr/bin/netstat, /usr/bin/wget, /usr/bin/top, /usr/bin/cal, /usr/bin/date, /usr/bin/who, /usr/bin/ps, /usr/bin/clear, /u
sr/bin/df, /usr/bin/du, /usr/bin/free, /usr/bin/crontab, /usr/bin/yum,/usr/bin/make,/usr/bin/rm,/usr/sbin/ldconfig
# 默认规范
#
# 如果无法禁用tty上的回显(echo),拒绝运行,即输入密码时禁止显示
Defaults !visiblepw
#
#由于许多程序在搜索配置文件时使用它,因此保留HOME会带来安全隐患。请注意,当启用env_reset选项时,就已经设置了HOME,因此此选项仅适用于env_keep列表中,禁用了env_reset或HOME存在的配置。
Defaults always_set_home
#
Defaults env_reset,passwd_timeout=2.5,timestampe_timeout=4
Defaults env_keep = “COLORS DISPLAY HOSTNAME HISTSIZE INPUTRC KDEDIR LS_COLORS”
Defaults env_keep += “MAIL PS1 PS2 QTDIR USERNAME LANG LC_ADDRESS LC_CTYPE”
Defaults env_keep += “LC_COLLATE LC_IDENTIFICATION LC_MEASUREMENT LC_MESSAGES”
Defaults env_keep += “LC_MONETARY LC_NAME LC_NUMERIC LC_PAPER LC_TELEPHONE”
Defaults env_keep += “LC_TIME LC_ALL LANGUAGE LINGUAS _XKB_CHARSET XAUTHORITY”
#
# 将HOME添加到env_keep可以使用户通过sudo运行不受限制的命令。
# Defaults env_keep += “HOME”
Defaults secure_path = /sbin:/bin:/usr/sbin:/usr/bin
## 接下来是重要部分:哪些用户可以在哪些机器上运行哪些软件(sudoers文件可以在多个系统之间共享)。
## 语法:
## user MACHINE=COMMANDS
##
## COMMANDS部分可能会添加其他选项
##
## 允许root在任何地方运行任何命令
root ALL=(ALL) ALL
## 允许’sys’用户组的所有用户运行"NETWORKING",“SOFTWARE”,“SERVICES”,“STORAGE”,“DELEGATING”,“PROCESSES”,“LOCATE”,"DRIVERS"命令组的指令
# %sys ALL = NETWORKING, SOFTWARE, SERVICES, STORAGE, DELEGATING, PROCESSES, LOCATE, DRIVERS
## 允许wheel组中的所有成员运行系统上的所有指令
# %wheel ALL=(ALL) ALL
## 允许wheel组中的所有成员运行系统上的所有指令,不需要密码
# %wheel ALL=(ALL) NOPASSWD: ALL
## 允许users用户组中的所有成员以root用户身份mount和umount cdrom
# %users ALL=/sbin/mount /mnt/cdrom, /sbin/umount /mnt/cdrom
## 允许users用户组中的所有成员关闭系统
# %users localhost=/sbin/shutdown -h now
## 读取/etc/sudoers.d目录下的所有配置文件 (这里的 # 号并不是表示注释,是固定写法)
#includedir /etc/sudoers.d
## 为sudo添加日志审计功能,这样的话,只要使用使用sudo执行指令的用户,执行指令的详细信息都会记录在指定的日志文件中
Defaults logfile=/var/log/sudo.log
Aliases
## 主机组,您可能更愿意使用主机名(也可使用通配符匹配整个域)或IP地址。
# Host_Alias FILESERVERS = fs1, fs2
# Host_Alias MAILSERVERS = smtp, smtp2
## User Aliases
## 用户,这些通常不是必需的,因为您可以在此文件中使用常规组(即来自文件,LDAP,NIS等) - 只需使用%groupname,而不是USERALIAS
# User_Alias ADMINS = jsmith, mikem
## Command Aliases
## 相关命令的集合
## 网络相关的指令
# Cmnd_Alias NETWORKING = /sbin/route, /sbin/ifconfig, /bin/ping, /sbin/dhclient, /usr/bin/net, /sbin/iptables, /usr/bin/rfcomm, /usr/bin/wvdial, /sbin/iwconfig, /sbin/mii-tool
## 软件安装和管理使用的指令
# Cmnd_Alias SOFTWARE = /bin/rpm, /usr/bin/up2date, /usr/bin/yum
## 服务相关的指令
# Cmnd_Alias SERVICES = /sbin/service, /sbin/chkconfig
## 升级locate数据库的指令
# Cmnd_Alias LOCATE = /usr/bin/updatedb
## 存储相关的指令
# Cmnd_Alias STORAGE = /sbin/fdisk, /sbin/sfdisk, /sbin/parted, /sbin/partprobe, /bin/mount, /bin/umount
## 委派权限相关的指令
# Cmnd_Alias DELEGATING = /usr/sbin/visudo, /bin/chown, /bin/chmod, /bin/chgrp
## 进程相关的指令
# Cmnd_Alias PROCESSES = /bin/nice, /bin/kill, /usr/bin/kill, /usr/bin/killall
## 驱动模块的相关的指令
# Cmnd_Alias DRIVERS = /sbin/modprobe
##开发常用指令
Cmnd_Alias DEVELOP = /usr/bin/cd, /usr/bin/pwd, /usr/bin/mkdir, /usr/bin/rmdir, /usr/bin/basename, /usr/bin/dirname, /usr/bin/vi, /usr/bin/diff, /usr/bin/find, /usr/bin/cat, /usr/bin/ta
c, /usr/bin/rev, /usr/bin/head, /usr/bin/tail, /usr/bin/tailf, /usr/bin/echo, /usr/bin/wc, /usr/bin/chown, /usr/bin/chmod, /usr/bin/chgrp, /usr/bin/gzip, /usr/bin/zcat, /usr/bin/gunzip,/
usr/bin/tar, /usr/sbin/ifconfig, /usr/bin/ping, /usr/bin/telnet, /usr/bin/netstat, /usr/bin/wget, /usr/bin/top, /usr/bin/cal, /usr/bin/date, /usr/bin/who, /usr/bin/ps, /usr/bin/clear, /u
sr/bin/df, /usr/bin/du, /usr/bin/free, /usr/bin/crontab, /usr/bin/yum,/usr/bin/make,/usr/bin/rm,/usr/sbin/ldconfig
# 默认规范
#
# 如果无法禁用tty上的回显(echo),拒绝运行,即输入密码时禁止显示
Defaults !visiblepw
#
#由于许多程序在搜索配置文件时使用它,因此保留HOME会带来安全隐患。请注意,当启用env_reset选项时,就已经设置了HOME,因此此选项仅适用于env_keep列表中,禁用了env_reset或HOME存在的配置。
Defaults always_set_home
#
Defaults env_reset,passwd_timeout=2.5,timestampe_timeout=4
Defaults env_keep = “COLORS DISPLAY HOSTNAME HISTSIZE INPUTRC KDEDIR LS_COLORS”
Defaults env_keep += “MAIL PS1 PS2 QTDIR USERNAME LANG LC_ADDRESS LC_CTYPE”
Defaults env_keep += “LC_COLLATE LC_IDENTIFICATION LC_MEASUREMENT LC_MESSAGES”
Defaults env_keep += “LC_MONETARY LC_NAME LC_NUMERIC LC_PAPER LC_TELEPHONE”
Defaults env_keep += “LC_TIME LC_ALL LANGUAGE LINGUAS _XKB_CHARSET XAUTHORITY”
#
# 将HOME添加到env_keep可以使用户通过sudo运行不受限制的命令。
# Defaults env_keep += “HOME”
Defaults secure_path = /sbin:/bin:/usr/sbin:/usr/bin
## 接下来是重要部分:哪些用户可以在哪些机器上运行哪些软件(sudoers文件可以在多个系统之间共享)。
## 语法:
## user MACHINE=COMMANDS
##
## COMMANDS部分可能会添加其他选项
##
## 允许root在任何地方运行任何命令
root ALL=(ALL) ALL
## 允许’sys’用户组的所有用户运行"NETWORKING",“SOFTWARE”,“SERVICES”,“STORAGE”,“DELEGATING”,“PROCESSES”,“LOCATE”,"DRIVERS"命令组的指令
# %sys ALL = NETWORKING, SOFTWARE, SERVICES, STORAGE, DELEGATING, PROCESSES, LOCATE, DRIVERS
## 允许wheel组中的所有成员运行系统上的所有指令
# %wheel ALL=(ALL) ALL
## 允许wheel组中的所有成员运行系统上的所有指令,不需要密码
# %wheel ALL=(ALL) NOPASSWD: ALL
## 允许users用户组中的所有成员以root用户身份mount和umount cdrom
# %users ALL=/sbin/mount /mnt/cdrom, /sbin/umount /mnt/cdrom
## 允许users用户组中的所有成员关闭系统
# %users localhost=/sbin/shutdown -h now
## 读取/etc/sudoers.d目录下的所有配置文件 (这里的 # 号并不是表示注释,是固定写法)
#includedir /etc/sudoers.d
## 为sudo添加日志审计功能,这样的话,只要使用使用sudo执行指令的用户,执行指令的详细信息都会记录在指定的日志文件中
Defaults logfile=/var/log/sudo.log
转载于:https://www.cnblogs.com/wyzhou/p/10527535.html
智能推荐
while循环&CPU占用率高问题深入分析与解决方案_main函数使用while(1)循环cpu占用99-程序员宅基地
文章浏览阅读3.8k次,点赞9次,收藏28次。直接上一个工作中碰到的问题,另外一个系统开启多线程调用我这边的接口,然后我这边会开启多线程批量查询第三方接口并且返回给调用方。使用的是两三年前别人遗留下来的方法,放到线上后发现确实是可以正常取到结果,但是一旦调用,CPU占用就直接100%(部署环境是win server服务器)。因此查看了下相关的老代码并使用JProfiler查看发现是在某个while循环的时候有问题。具体项目代码就不贴了,类似于下面这段代码。while(flag) {//your code;}这里的flag._main函数使用while(1)循环cpu占用99
【无标题】jetbrains idea shift f6不生效_idea shift +f6快捷键不生效-程序员宅基地
文章浏览阅读347次。idea shift f6 快捷键无效_idea shift +f6快捷键不生效
node.js学习笔记之Node中的核心模块_node模块中有很多核心模块,以下不属于核心模块,使用时需下载的是-程序员宅基地
文章浏览阅读135次。Ecmacript 中没有DOM 和 BOM核心模块Node为JavaScript提供了很多服务器级别,这些API绝大多数都被包装到了一个具名和核心模块中了,例如文件操作的 fs 核心模块 ,http服务构建的http 模块 path 路径操作模块 os 操作系统信息模块// 用来获取机器信息的var os = require('os')// 用来操作路径的var path = require('path')// 获取当前机器的 CPU 信息console.log(os.cpus._node模块中有很多核心模块,以下不属于核心模块,使用时需下载的是
数学建模【SPSS 下载-安装、方差分析与回归分析的SPSS实现(软件概述、方差分析、回归分析)】_化工数学模型数据回归软件-程序员宅基地
文章浏览阅读10w+次,点赞435次,收藏3.4k次。SPSS 22 下载安装过程7.6 方差分析与回归分析的SPSS实现7.6.1 SPSS软件概述1 SPSS版本与安装2 SPSS界面3 SPSS特点4 SPSS数据7.6.2 SPSS与方差分析1 单因素方差分析2 双因素方差分析7.6.3 SPSS与回归分析SPSS回归分析过程牙膏价格问题的回归分析_化工数学模型数据回归软件
利用hutool实现邮件发送功能_hutool发送邮件-程序员宅基地
文章浏览阅读7.5k次。如何利用hutool工具包实现邮件发送功能呢?1、首先引入hutool依赖<dependency> <groupId>cn.hutool</groupId> <artifactId>hutool-all</artifactId> <version>5.7.19</version></dependency>2、编写邮件发送工具类package com.pc.c..._hutool发送邮件
docker安装elasticsearch,elasticsearch-head,kibana,ik分词器_docker安装kibana连接elasticsearch并且elasticsearch有密码-程序员宅基地
文章浏览阅读867次,点赞2次,收藏2次。docker安装elasticsearch,elasticsearch-head,kibana,ik分词器安装方式基本有两种,一种是pull的方式,一种是Dockerfile的方式,由于pull的方式pull下来后还需配置许多东西且不便于复用,个人比较喜欢使用Dockerfile的方式所有docker支持的镜像基本都在https://hub.docker.com/docker的官网上能找到合..._docker安装kibana连接elasticsearch并且elasticsearch有密码
随便推点
Python 攻克移动开发失败!_beeware-程序员宅基地
文章浏览阅读1.3w次,点赞57次,收藏92次。整理 | 郑丽媛出品 | CSDN(ID:CSDNnews)近年来,随着机器学习的兴起,有一门编程语言逐渐变得火热——Python。得益于其针对机器学习提供了大量开源框架和第三方模块,内置..._beeware
Swift4.0_Timer 的基本使用_swift timer 暂停-程序员宅基地
文章浏览阅读7.9k次。//// ViewController.swift// Day_10_Timer//// Created by dongqiangfei on 2018/10/15.// Copyright 2018年 飞飞. All rights reserved.//import UIKitclass ViewController: UIViewController { ..._swift timer 暂停
元素三大等待-程序员宅基地
文章浏览阅读986次,点赞2次,收藏2次。1.硬性等待让当前线程暂停执行,应用场景:代码执行速度太快了,但是UI元素没有立马加载出来,造成两者不同步,这时候就可以让代码等待一下,再去执行找元素的动作线程休眠,强制等待 Thread.sleep(long mills)package com.example.demo;import org.junit.jupiter.api.Test;import org.openqa.selenium.By;import org.openqa.selenium.firefox.Firefox.._元素三大等待
Java软件工程师职位分析_java岗位分析-程序员宅基地
文章浏览阅读3k次,点赞4次,收藏14次。Java软件工程师职位分析_java岗位分析
Java:Unreachable code的解决方法_java unreachable code-程序员宅基地
文章浏览阅读2k次。Java:Unreachable code的解决方法_java unreachable code
标签data-*自定义属性值和根据data属性值查找对应标签_如何根据data-*属性获取对应的标签对象-程序员宅基地
文章浏览阅读1w次。1、html中设置标签data-*的值 标题 11111 222222、点击获取当前标签的data-url的值$('dd').on('click', function() { var urlVal = $(this).data('ur_如何根据data-*属性获取对应的标签对象